- Honeycrisp
Theme
Below you will find comprehensive installation and set up instructions for this theme. If after following this guide, you run into any technical issues, please feel free to contact support.
Basic SEO Tips
SEO means Search Engine Optimization. This refers to practices that help Google understand your page better, hopefully resulting in improved search result rankings and more website traffic. Below are some best practices to know.
Install Google Analytics
If you’re trying to measure & analyze traffic to your website, you should install Google Analytics.
First, make sure you have the WP Code Lite plugin installed on your website. In the Dashboard menu it’s listed as Code Snippets.
Next, go to analytics.google.com and follow along with my video.
Helpful Links:
- Set Up Google Analytics for a website or app via Google support
Connect to Google Search Console
Google Search Console is related to Google Analytics, but separate. You use Google Search Console to make sure all your website pages are “indexed” by Google, meaning they can show up in Google search results. To do this, we’ll connect your site to Google Search Console and submit something called a sitemap.
Go to https://search.google.com/search-console/ and click Start Now. The step you will take are:
- Sign in with your Google account
- Verify ownership of your website
- Submit the sitemap.
Follow along in this video & I’ll show you how.
Helpful Links:
- Getting Started with Search Console via Google support
Correct header tag sequence
There are two types of text on a website pages – paragraphs and headers. This text is a paragraph. The text above that reads “Correct header tag sequence” is a header.
Proper header usage will…
- keep your page organized
- help search engines to follow the structure of your page
- improve accessibility for visually impaired visitors
Properly configured headers can also be used to create a table of contents in a blog post, like the one you see off to the right. Headers are denoted with tags H1 thru H6.
The title of your page or post is ALWAYS H1. Any additional headings on the page with be H2, with subheadings using H3, H4, and so on.
In a blog post your H tags would look something like this:
- Article Title – H1
- Introduction – H2
- 1st Section – H2
- Subsection – H3
- Subsection – H3
- Sub-subsection – H4
- 2nd Section – H2
- Subsection – H3
- Conclusion – H2
You can use a tool like Google Pagespeed Insights to make sure everything on your page is properly sequenced. This tool also checks your website speed & other metrics. Simply put in your website URL, then check the Accessibility score.
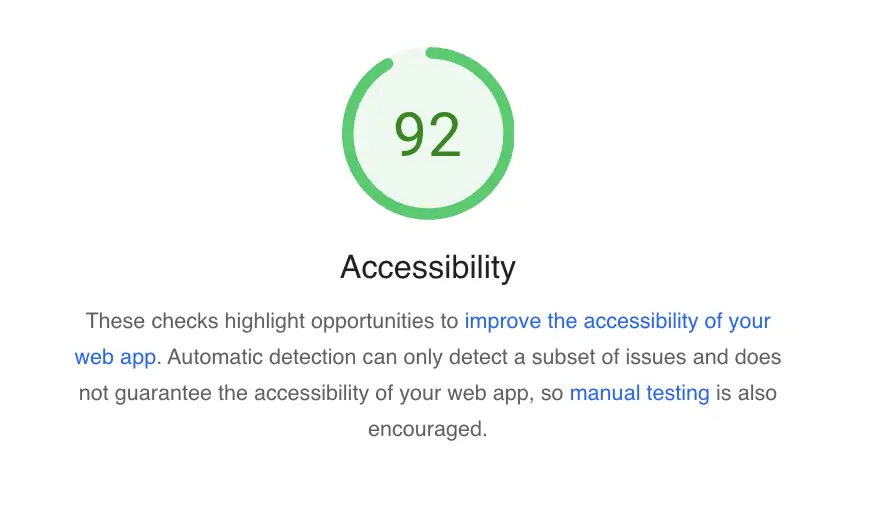
If there are any header tags used incorrectly (i.e. out of sequence) on your page, Pagespeed Insights will show the below notification. There will also be a list of which specific headings on your page need to be changed.

Alt text for images
All images on your website should have alt text. Alt text is NOT the same as a caption. It is a literal, descriptive line of text describing exactly what’s in the photo.
Add alt text directly below any new image you upload. Or click on an image already embedded in your page/page, and add the alt text under Image Settings in the block editor panel.
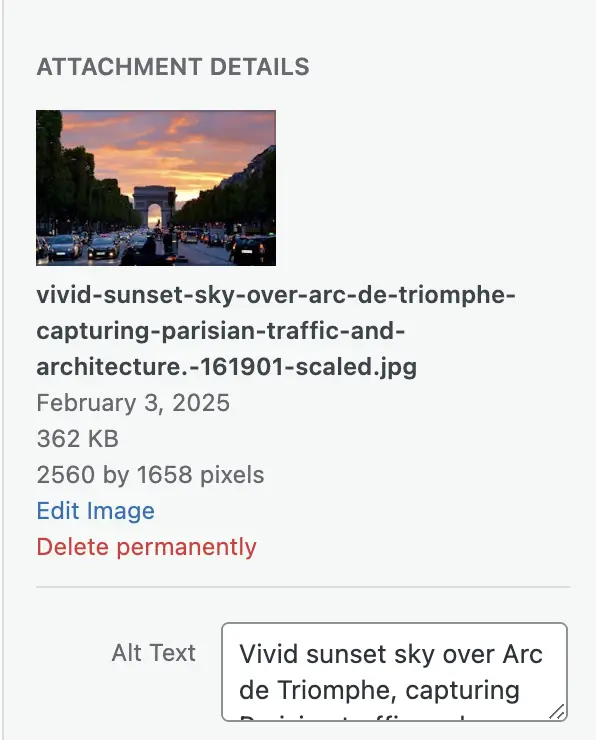
Take this image for example (via Pexels.com). Its alt text reads: “Vivid sunset sky over Arc de Triomphe, capturing Parisian traffic and architecture.” Essentially, if someone can’t see the image it helps to paints a picture of the image in their mind, and explain the INTENT of the image.

The caption for this image is “Visiting the Champs-Élysées at sunset in Paris is a must!” The caption relates to the image, of course, but isn’t usually a literal description of what’s in the photo.
Take some time to go through your Media Library and ensure all images used on your site have alt text added.
Resize/compress images
Speaking of images, properly sizing all your website images is a good way to improve your site speed.
Here is how I suggest to optimize your images.
First, upload your image to Cloud Convert. Convert your image to WebP format – this is a next generation image format that loads quickly. You can also click the wrench icon to adjust the image size.
For example, if you have a headshot photo that’s 4000×6000 pixels, it doesn’t really need to be that big. The “width” of most sections in this theme are about 1140 pixels across, so there’s no need to try and cram a giant image in there. It will only load down your page loading speed.
Just don’t make the image too small, otherwise it will be blurry. Download your newly compressed image and then add it into the desired location on your website.
Another option for optimizing images is to upload your JPG or PNG image directly to your WordPress Media Library, then use a plugin like Smush or Converter For Media to compress or convert to a next-gen format like WebP. Some caching/performance plugins like W3 Total Cache (one of my recommended plugins) will also include an image optimization feature.
Use descriptive text on buttons
Button text should be descriptive and indicate the purpose of clicking the button. This is another accessibility-focused best practice, but it also helps Google’s search engine crawlers to better understand the layout and flow of your website.
By “descriptive” what I mean is don’t label your button something like “Click here” or “Learn more” – these are very vague. If someone is using a screen reader to navigate through your website, it can be confusing to have buttons with vague, non-descriptive names.
Better ways to name buttons might be options such as…
- Book A Call Now
- Schedule Your Appointment
- Explore Our Services
- Check Your Insurance Benefits
- Read The Blog
Use your SEO plugin when writing blogs
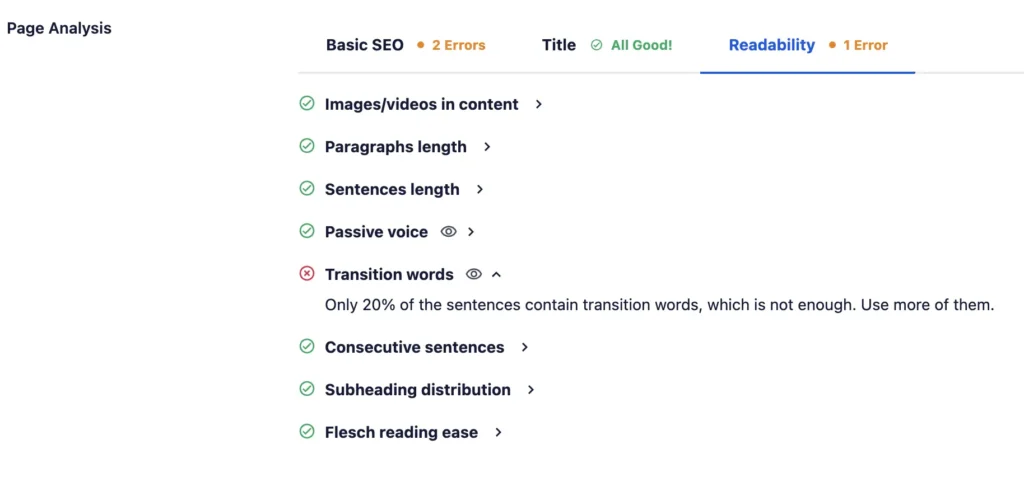
My last tip for improving SEO and navigability of your site is to use an SEO plug-in when writing posts! I previously suggested to install an SEO plug-in like Yoast SEO or AIOSEO. Don’t make the mistake of thinking that installing this plugin automatically improves your SEO. They are tools that help you improve various elements of your pages and posts to be more SEO-friendly.
Once installed, you can find these tools by scrolling allll the way to the bottom of the post editor. The plugin will tell you where you’re doing well, and what can be improved.
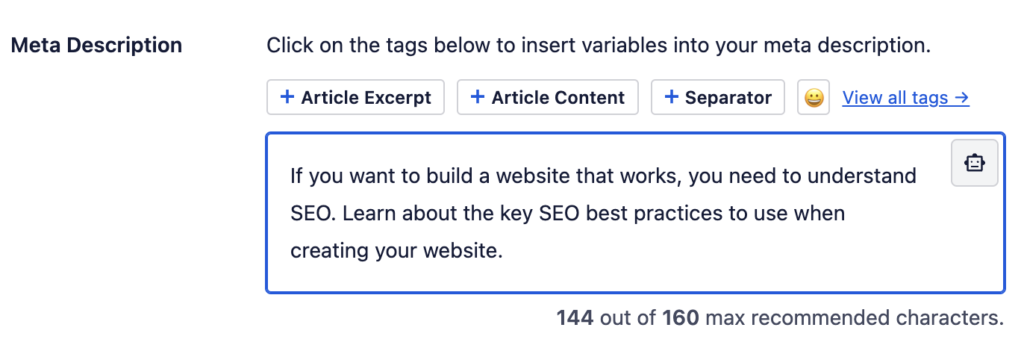
Add A Meta Description
You can also use these tools to add a meta description for your page. A meta description is a short excerpt of what your post is about. It’s what shows up in the Google search results under your website name. If you don’t set a meta description, Google will automatically pull in whatever it thinks is the most important info on your page and use that as the meta description instead.
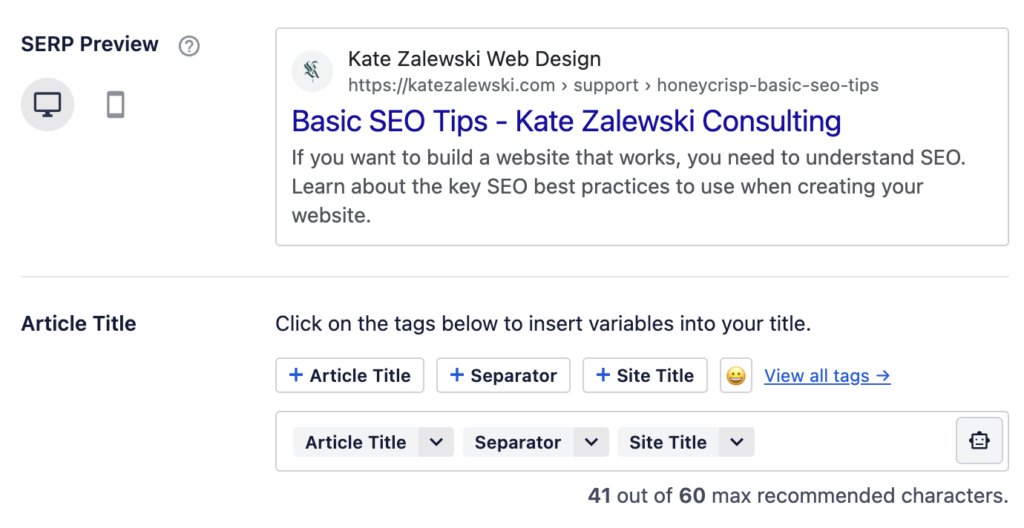
Edit SERP Appearance
Speaking of Google search results – you can also preview your SERP! SERP stands for Search Engine Results Page, i.e. how your page will show up in search results. The meta description you added shows up in the SERP preview, as you can see below.
The Article Title can be changed as well. FYI, this does not change the ACTUAL title of your article, it just changes how it appears in the search results.
For example, if you’re someone who bought the Honeycrisp theme, you already know that you’re on this page because you are setting up WordPress and wanting to get some SEO tips.
However, for anyone else who randomly finds this page via Google, a title like “Basic SEO Tips For First Time WordPress Users” might be a better description to use. Changing the title is also an opportunity to include specific keywords you want to rank for.
Keyword research
Most of the items discussed here are more about the logistics and setup of your website. But WHAT you write about on your site matters too. Keyword research is the process of exploring what types of words/keywords people might be searching for, and if there’s a lot of competition out there for these keywords.
An example: in the process of doing keyword research for my nutrition blog, there was not much competition for the term “CKD and green tea”. But this term had a moderately high monthly search volume of 10K-100K. This meant that if I wrote a decent article on the topic, I’d have a good change of making it to the top of the search results.
In contrast, a keyword like “GLP-1” has over 1 MILLION monthly searches and high competition from other sites that have already written about this topic.
The key is writing about topics that a lot of people are searching for, but haven’t yet been written about much. You can use tools like Ahrefs or Semrush to do keyword research.
Conclusion
That’s it, we’ve reviewed the basics of SEO in WordPress. When I got serious about implementing these same tips myself I was able to increase my blog traffic nearly 400% over the last 16 months (at the time of writing this). I was even able to get approved to join an ad network to place ads on my site.
SEO is a long game, for sure. But if you follow these basic tips, it can really pay off in terms of increasing your traffic, growing visibility and name recognition for your business, and potentially even making some passive income via ad revenue.
Next, review the final launch checklist before sharing your site with the world.