- Honeycrisp
Theme
Below you will find comprehensive installation and set up instructions for this theme. If after following this guide, you run into any technical issues, please feel free to contact support.
Getting Started
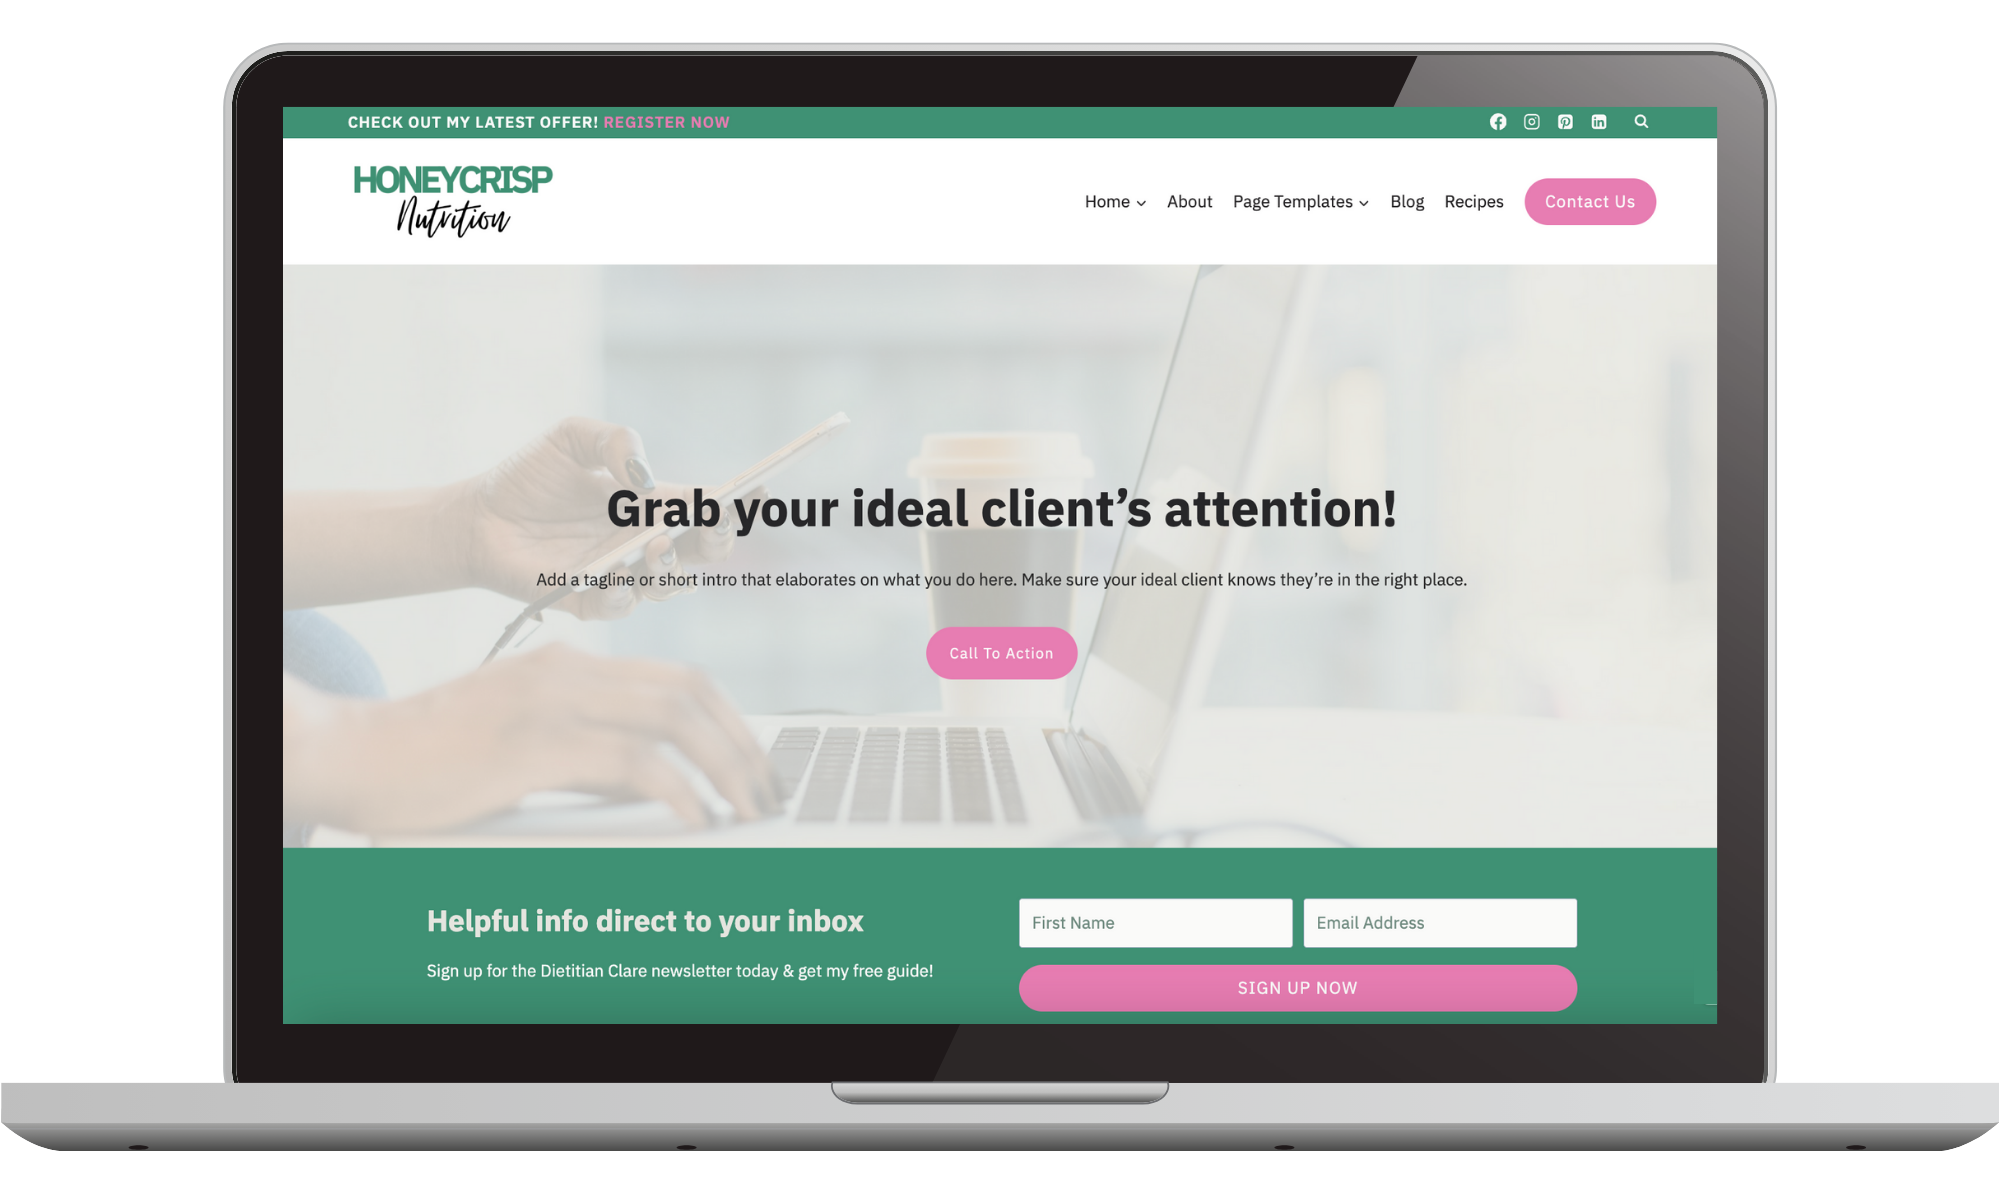
Thanks for purchasing Honeycrisp! Honeycrisp is premium WordPress theme for dietitians, built on the Kadence WP framework. In the following guides, I will show you how to install and customize your theme.
A few terms to know before we start:
- Theme: in WordPress, a theme determines the basic framework, functionality and styling of the site. The theme allows you to define colors, fonts, logos, navigation menus, and more. Read more about themes at WordPress Support or at WPBeginner.
- Child Theme: Honeycrisp is a child theme of Kadence. A child theme inherits the basic functions & styling of the parent theme, but allows for additional customization. Read more about child themes here.
- Template: a template determines the layout of individual website pages. Honeycrisp theme comes packages with 17 pre-built page templates that you’ll edit & fill in with your own text, images, etc.
Where To Access Your Product
You can download your new website theme from the link included in your order confirmation email, or in the My Account page when logged into katezalewski.com
You will have two files:
- honeycrisp-theme-for-kadence.zip
- honeycrisp-supplementary-files.zip.
honeycrisp-theme-for-kadence.zip is your actual child theme. Do NOT extract this zip file.
DO extract themename-supplementary-files.zip. The supplementary files include a changelog, plus any additional assets or information required for the child theme.
Before You Start
To install the Honeycrisp WordPress theme, first, you must have a website with WordPress installed. I recommend to start with a fresh WordPress installation, rather than trying to install this theme on an existing website.
If you are 100% brand new to WordPress, here is what to do to create a site & install WordPress. If not, feel free to skip ahead to the next section.
1. Buy website hosting services
You will want to purchased hosting that include “managed WordPress hosting” from a provider like BigScoots, Hostinger, or Siteground. Managed WordPress hosting means that the host makes it easy to install and manage WordPress on your website.
2. Get a domain name
Sometimes your hosting plan will include a free domain name for 1 year. That’s an option, but I like to purchase my domain names elsewhere, as I find it’s often cheaper this way in the long run. My favorite place to buy domain names is Namecheap.
3. Create a new website and install WordPress
Depending on what host you’re using the exact process will vary a bit. Please review the step-by-step instructions on how to do this from my 3 preferred hosts:
- BigScoots: Steps to getting started with your new WPO (WordPress Optimized hosting) service
- Hostinger: How to set up a hosting plan & create a new website
- Siteground: Create a new website
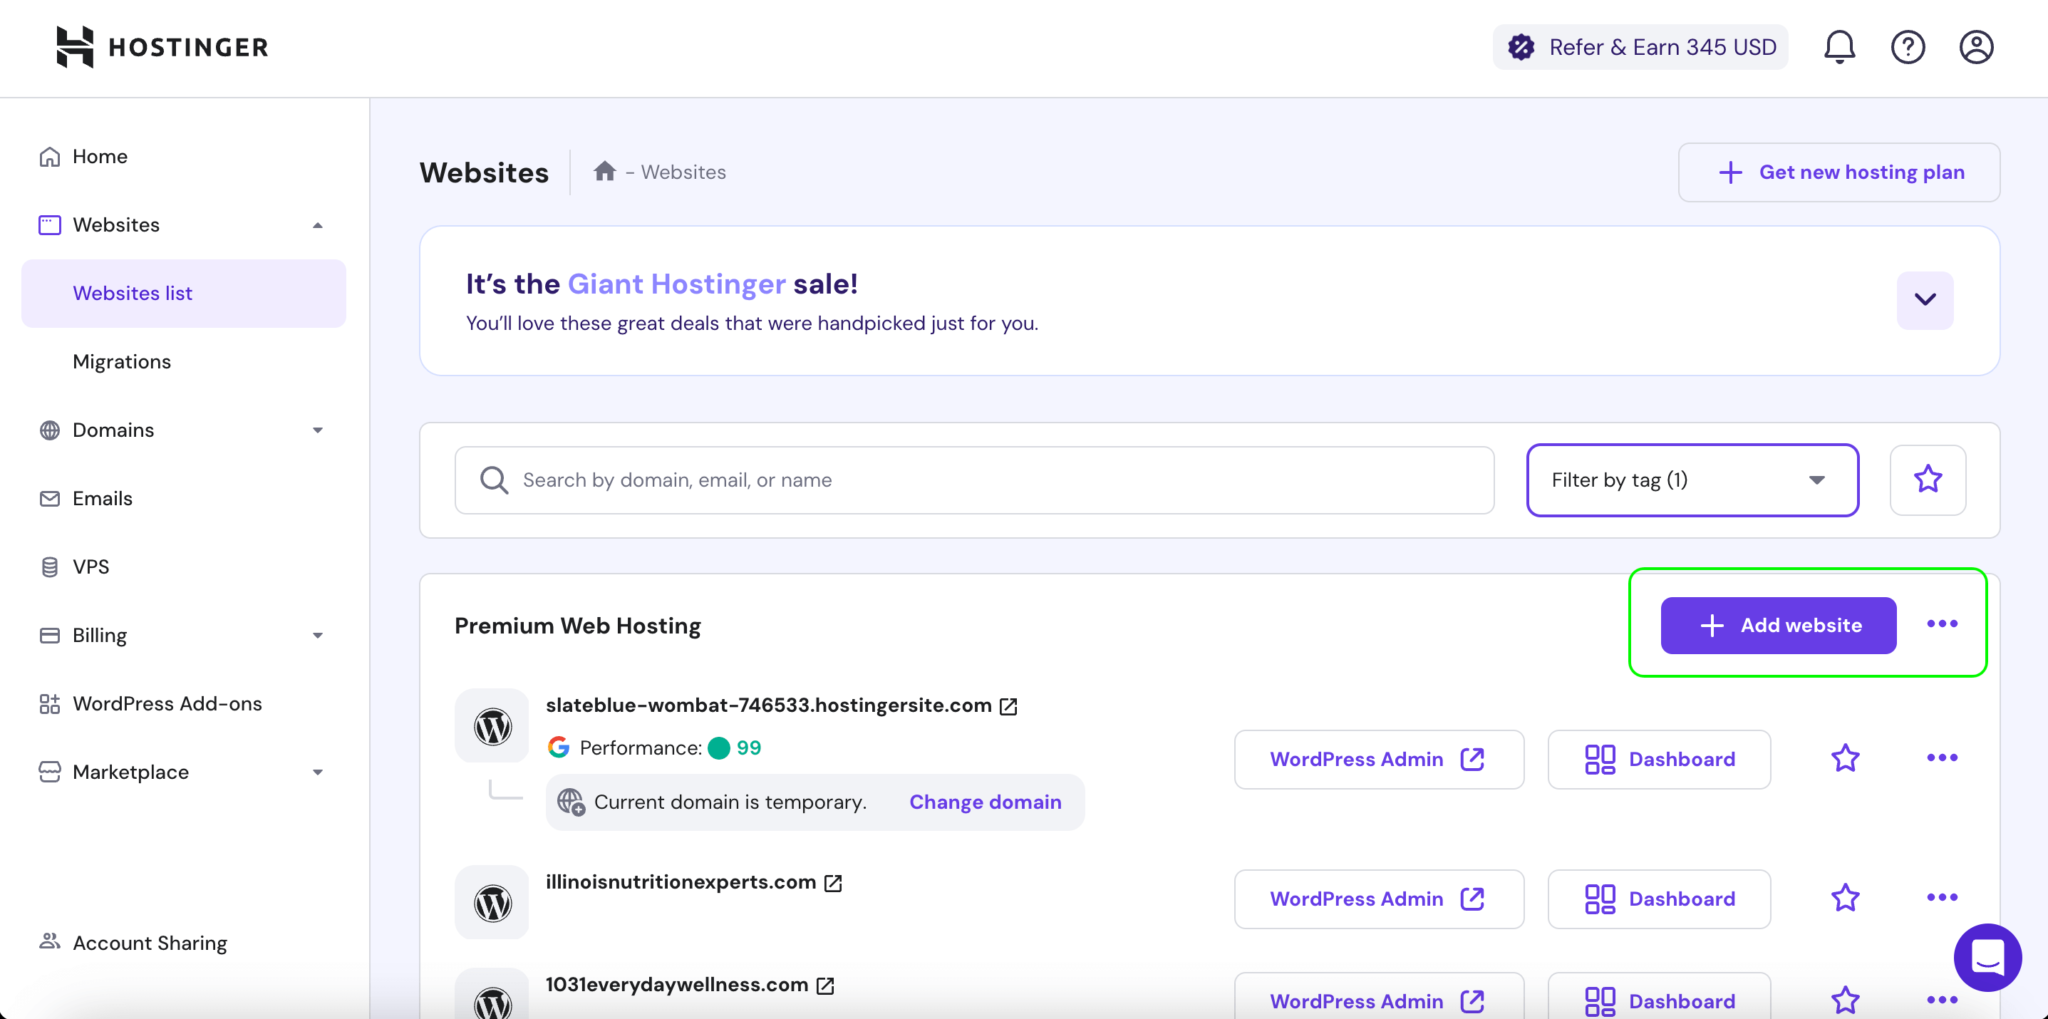
Below is a screenshot of what I see in my Hostinger account. I have purchased their Premium Web Hosting plan. To add a new website to my account, I just click “Add website”, choose “WordPress”, and then follow the instructions on the screens that follow. You can either set up your site on a temporary domain, or connect it to a domain name that you own.
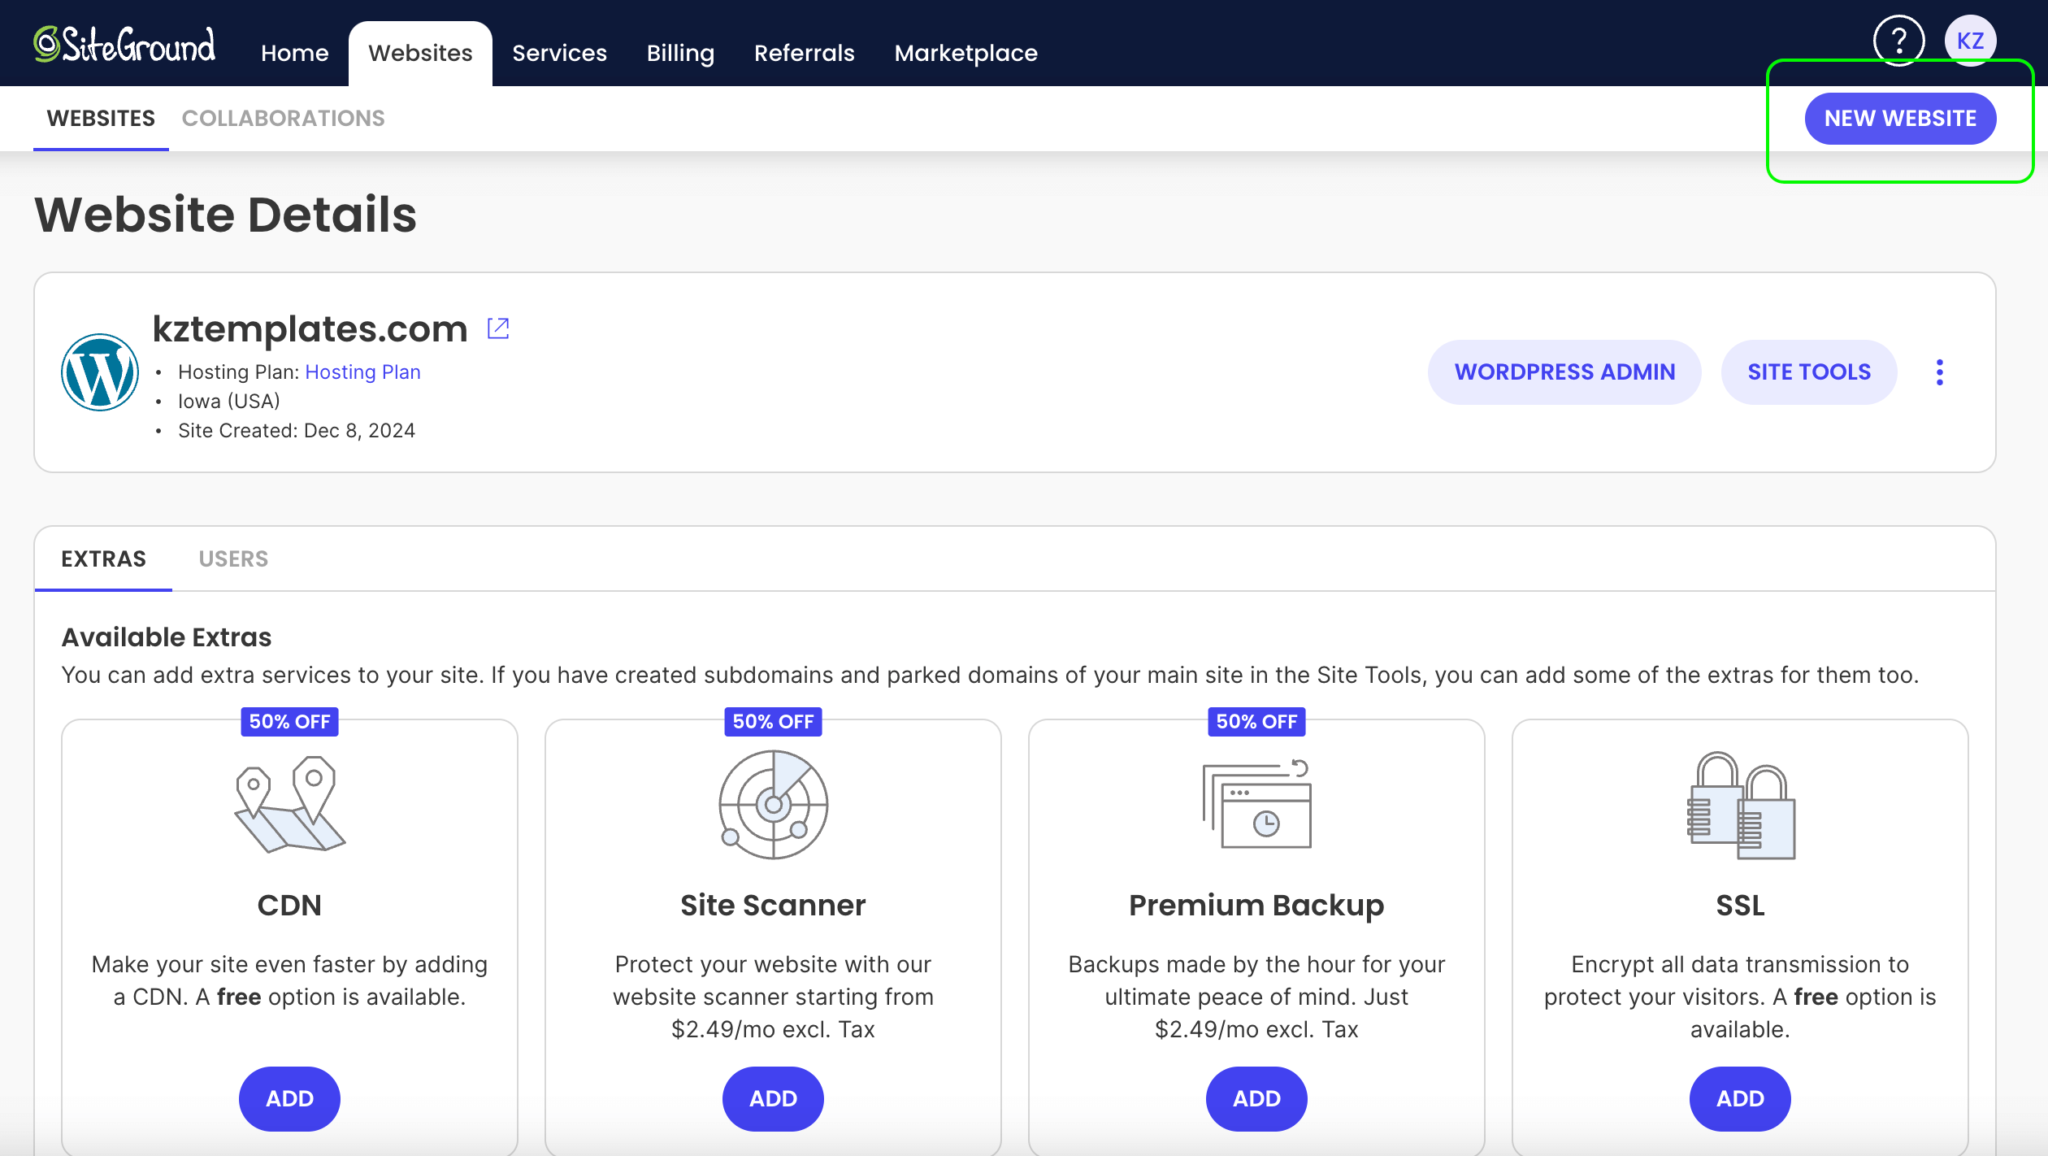
Additionally, here is a screenshot of what I see in my Siteground account. Once I have purchase a hosting plan and logged into my Siteground account, I can just click “New Website” to start the process of creating a new site.
Additional Documentation on WordPress & Kadence
In the spirit of keeping this article focused on installation & setup for the Honeycrisp theme, please note that you can find extensive documentation on WordPress, Kadence, etc. elsewhere.
WordPress:
- Learn WordPress (official tutorials from WordPress.org)
- WPBeginner (unofficial website full of incredibly helpful WordPress tutorials)
Kadence theme & Blocks:
- Using the Kadence Theme
- Using Kadence Blocks – commonly used blocks found in this theme include…
- Text (Adv) Block – use this type of block when adding text to your site
- Image (Adv) Block – use to add or edit images
- Icon List Block – use when creating or editing lists
- Buttons (Adv) Block – use to add or edit buttons throughout your site
- Row Layout Block – rows make it easy to organize your page into sections and columns
You’ll see me use these various blocks as we proceed through the tutorials and start editing pages.
While there can be a bit of a learning curve with WordPress & Kadence, it is well worth it for the flexibility it offers, especially if you’re aiming to use blogging and SEO to grow your website traffic.
Next: time to install your theme!
Honeycrisp Setup Guide