
Introduction
Writing a blog post in WordPress is not as simple as typing out an article and hitting “publish.” If you’re trying to write a post that’s engaging and attracts traffic, there are several other key things to know.
As a heads up, this article is intended for people using the Gutenburg page editor in WordPress, NOT the Classic Editor. Gutenburg (also known as “the block editor”) is the default way to compose blog posts on new WordPress sites. If your site is older, you might still have the Classic Editor on your site. This article explains more about the difference between editor types and how to switch between them.
Once you know you have the block editor running, read on.
What To Write About
What should you write about? Well, it’s your blog, so you can write about anything you want. I like to write blog posts about frequently asked questions, that way I can easily direct people to my blog the next time I get the question.
For example, I saw fellow dietitians in Facebook groups asking how to integrate Practice Better (an EMR) with Claim.MD (a clearinghouse for insurance claims). So I wrote a post about it that I can share the next time this question comes up.
But, if you’re trying to use your blog to attract traffic to your site, it’s a good idea to do some keyword research before you start writing.
Keyword research is the process of exploring what types of words/keywords people might be searching for, and if there’s a lot of competition out there for these keywords. The key is writing about topics that a lot of people are searching for, but haven’t yet been written about much. You can use tools like Ahrefs or Semrush to do keyword research.
Format The Text Properly
Proper formatting makes for a blog post that’s organized and easy-to-read. It also helps search engines to better understand what your article is about.
As a general rule, I like to start my posts with an introduction, include several top level headings, then wrap up with a conclusion & summary.
Break up your post with headers
There are two types of text on a website pages – paragraphs and headers. This text is a paragraph. The text above that reads “Break up your post with headers” is a header.
Using headers helps to organize your article and also visually breaks up the text. No one like to see a giant block of text and having to scan thru the text to find the text points. Make the key points nice & big by setting them as a header, so your audience can find useful information more easily.
Try to keep the length of text between header sections roughly the same. If you have a section of paragraph text that’s getting too long, you may want to think about adding in a header to break it up.
Correct header tag sequence
Test your header tag sequencing

Use headers to create a table of contents
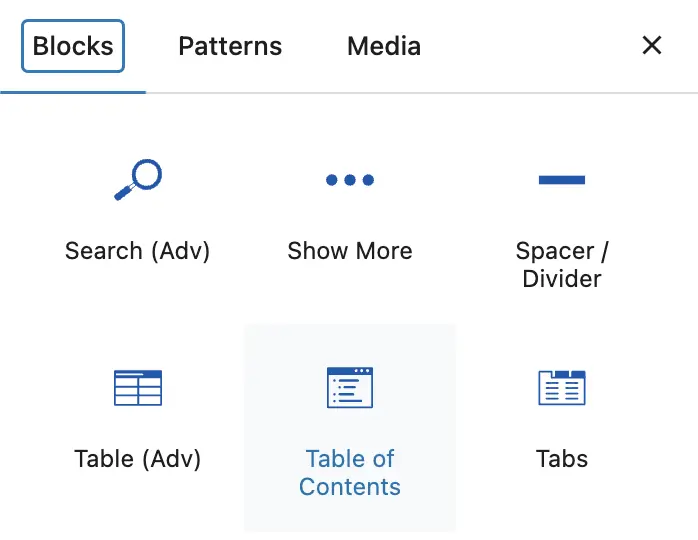
You can see a table of contents at the top of this article. No need to type that out manually — it’s created automatically from the header tags used in this article!
To add a table of contents into your WordPress post, if you’re using the block editor just add a Table of Contents block to the top of your blog post. The table of contents block looks like this:
Once you add in your Table of Contents block, you can edit its appearance just like text, images, or any other element on your website.
Use Images The Right Way
You should always include images in your blog post. They helped to make your post a lot more engaging, and interesting to read! Here’s what to know about adding images to your post.
Add a featured image
Your blog post should have a featured image.
To add a featured image, click “Post” on the right side of your editor under the Settings tab, then click “Set featured image”. You can use a stock image, a photo you’ve taken, or even a custom image you’ve created in Canva like you see on some of my posts on this site. Up to you! The image can be portrait or landscape orientation, but I usually find that landscape orientation looks best.
Once you set your featured image, it will automatically appear at the top of your blog post (once published, that is — it won’t be visible in the block editor). It’s also the image that shows up with the article on your main blog archive page.
Additionally, the featured image is the image that may appear when you share your post URL on social media or in an email or text message.
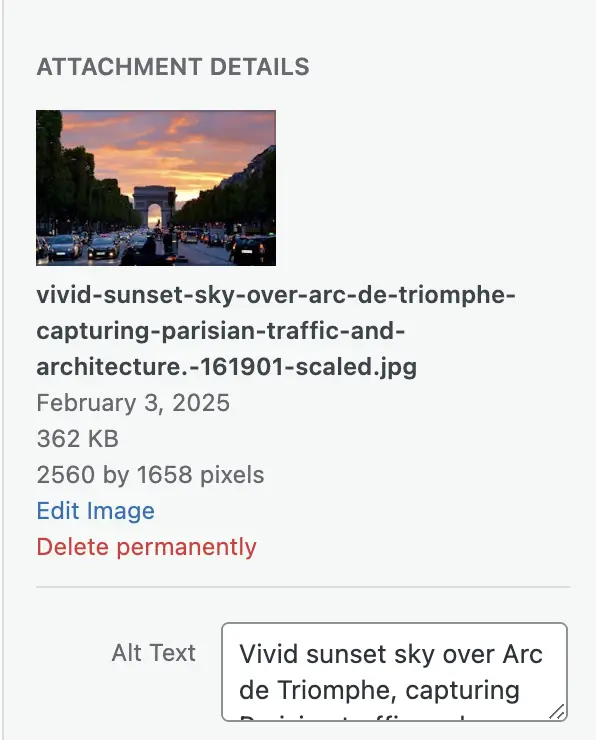
Alt text for images

Resize/compress images
Another option for optimizing images is to upload your JPG or PNG image directly to your WordPress Media Library, then use a plugin like Smush or Converter For Media to compress or convert to a next-gen format like WebP. Some caching/performance plugins like W3 Total Cache (one of my recommended plugins) will also include an image optimization feature.
Use An SEO Plugin
Add a meta description
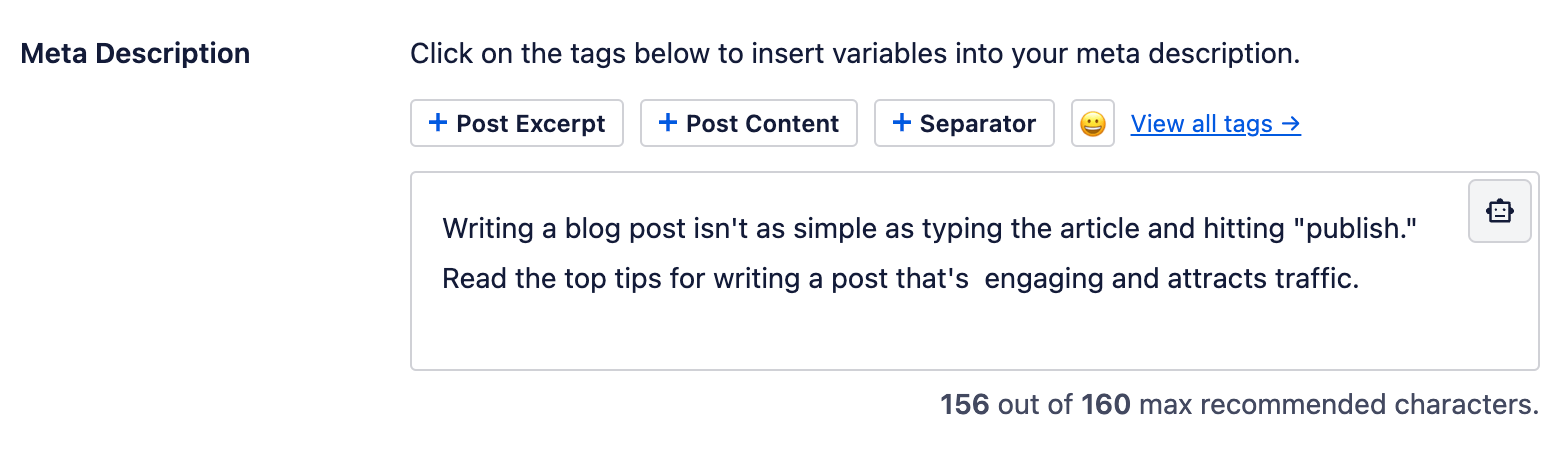
You can also create a post excerpt to use as the meta description. On your blog archive page, do you notice how your site (most likely) just pulls in the first 20-50 words of your blog post? If you want to manually edit what appears here, you need to add a post excerpt.
An excerpt can be added by navigating within the block editor to Settings → Post → Add an excerpt. Type your short excerpt in here. Then if you add the + Post Excerpt variable into the meta description box, it will automatically pull in this text.
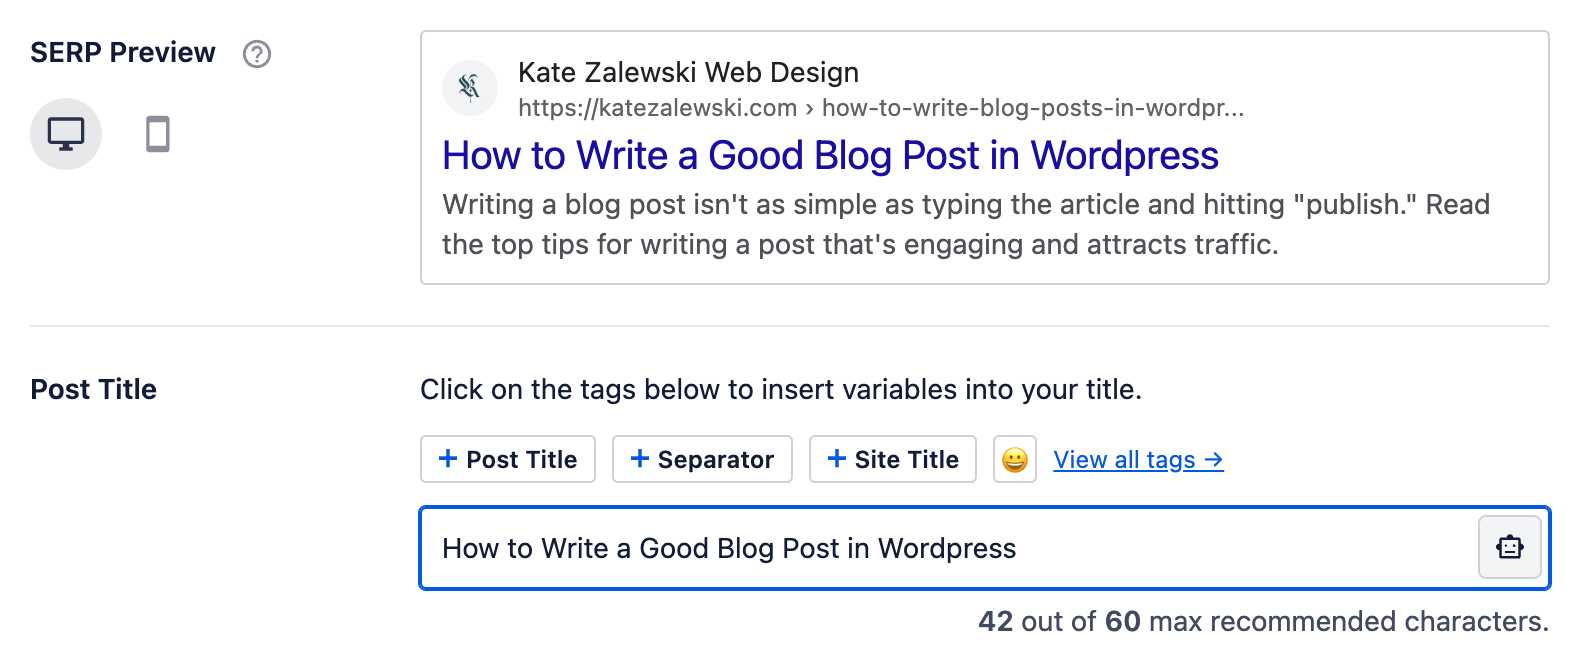
Edit SERP appearance
Before You Hit Publish
Before publishing your post, make sure to do TWO final things.
Categorize Your Post
All blog posts on your website should have a category. Categories ensure the blog section of your website is easily navigated by visitors. It also helps search engines like Google understand the different types of topics you write about.
You can add a category by navigating to Settings → Post → Categories. Add your blog post to a current category or create a new one if needed.
NOW – finally! – you can hit publish. Congrats on publishing your post!
Submit Post for Indexing
Hopefully your site is already connected to Google Analytics & Google Search Console. If not, follow these guides:
- Set Up Google Analytics for a website or app via Google support
- Getting Started with Search Console via Google support
To briefly explain the difference, Google Analytics is used to analyze website traffic and stats, while Google Search Console tells you which pages on your site are actually searchable (or “indexed”) on Google. Any time you add a new page or post to your site, you should submit it to Google Search Console to be indexed.
To submit your site for indexing, visit Google Search Console and open the account for your site. In the box at the top of the page that says “Inspect any URL…” paste in the URL for your newly published blog post.

You’ll get a notification that the URL is not on Google. Click “Request Indexing.” Your site is now in the queue to be added to Google’s index.
Conclusion
Now you’ve learned the key things to key in mind when composing a blog post in WordPress – from content to formatting to images to SEO. While this might sound like a lot at the moment, the more posts you write, the more all these things will become second nature to you.
Here’s a simple checklist to follow the next time you write a blog post:
Great work! Now sit back, relax, and watch as your website traffic begins to grow.
Did you find this article helpful? Leave a comment and let me know!
free!
Launch Your List
A free Mini-Course on How to Launch your Email List with Kit (Formerly ConvertKit)
In this 18-lesson course, you’ll learn the exact steps I follow to set up an email list for my clients. Plus, get my time-saving Welcome Sequence template + Canva Lead Magnet template. Sign up & get access to the course right away!
Such a helpful article, Kate!
Great post! I really liked how you walked through everything—from formatting headings and optimizing images to tying in SEO tools like Yoast. Super practical tips that I’ll try out on my next blog post.