
This article features an affiliate code, meaning I’ll earn a small commission if you make a purchase using my affiliate code. I only link to products and retailers that I use myself and recommend!
Introduction
If you are a business owner, having a designated email address where potential clients to get in touch is a MUST! However, you might be wondering exactly how to go about setting one up.
In this article, I’ll explain a few ways to set up a brand new email address for your business, highlighting my preferred method (using Google Workspace). I’ll also share some tips and tricks for getting the most out of your custom email. Without further ado, let’s dive in.
Why You Need A Business Email Address
As a small business owner, it’s important to keep a division between your business and your personal life – logistically, financially, and yes, mentally! Having a separate email account for your business is part of this separation.
I don’t know about you, but I get hundreds of junk emails sent to my personal account every day. No matter how many times I seem to hit “unsubscribe”! Additional emails pertaining to business matters would surely get lost in the shuffle. Using a designated business email address easily keeps things separate.
Having a designated email account for your business will also lend an air of professionalism. No one would take me seriously as a professional if my public-facing email was cats_are_cool99 (@) yahoo.com … and if that is actually someone’s email address… I’m sorry!
Technically you CAN sign up for an account with an email provider like Gmail or Yahoo and create an account like katezalewskiwebdesign (@) gmail.com or sallysmithnutrition (@) yahoo.com if you want to keep things simple. It’s certainly more professional than my prior example. Totally fine to do it like this!
But the very best way to set up a business email address (that looks the most legit, in my opinion) is to create an email address using a custom domain name. For example, info (@) sallysmithnutrition.com.
“But how do I do that?” you might be wondering. “Does this mean I have to build a website in order to get a custom email address?” To answer that question — NO! You don’t need a whole website just yet (unless you want one). You will need two things: a domain name and an email host.
Step One: Get A Domain Name
A domain name is like your digital street address. It’s a way for people find you online. For example, I own the domain name katezalewski.com, which connects to the website you’re on right now. I also own yourkidneydietitian.com, which I use for my private practice.
You can purchase as many domain names as you like, whether or not you have a business. For example, if Sally Smith the dietitian is starting her private practice, she may want to buy sallysmithnutrition.com. If Sally isn’t sure about starting a business, but thinks she might want to start her private practice someday, it might be worth purchasing sallysmith.com or sallysmithnutrition.com anyways, just to make sure no one else buys them first. Or, perhaps she wants to buy sallysmith.com just for fun. You do you, Sally.
Long story short, as long as a domain is available you can buy it. You just need to pay a (usually) small annual fee to retain ownership over that domain name. The place you buy a domain name a domain registrar.
Which Domain Registrar To Use
There are probably thousands of different domain registrars out there. I suggest checking out an option like NameCheap.com. No matter which one you use, the main page of the domain registrar will ask you what domain name you want. Search to see if it’s available:
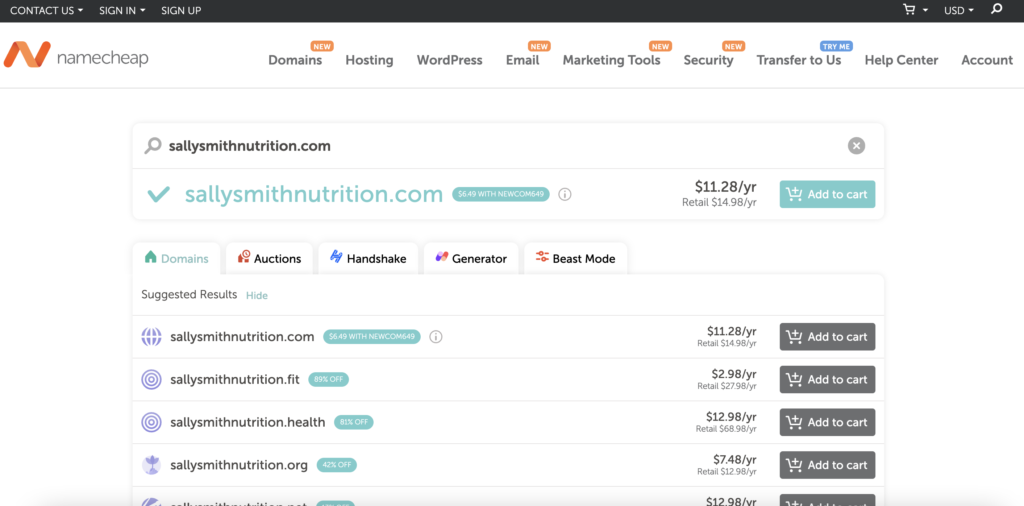
From here, simply click “Add to cart” and head to the checkout. You can purchase your domain name for 1 year or more. Usually, I purchase my domain names 1 year at a time, unless the domain registrar offers extra savings when buying multiple years at a time.
Unless it’s a domain name in high demand, your domain should usually cost $15 or less. “Premium” domain names, like the one shown below, can be VERY costly!

If someone else already owns the domain name you want, and you REALLY want it, you can “make an offer” on it. But I’ll warn you, this can get very costly as well. For example, if you want to make an offer on nutritionist.com, the minimum bid is $100,000. OOF! 🙃 Unless you’ve got cash to burn, or you are DEAD SET on a certain domain, you are better off purchasing a slightly different domain name.

This could mean purchasing a variation on your desired domain name, such as nutritionist.biz (available for $200 on NameCheap) or nutritionist.fit ($2.98). Or, go for something totally different like thechicagonutritionist.com ($11.98). Try out a couple different options and see what works for your business AND for your budget.
By the way, your domain name does NOT have to exactly match the name of your business or LLC. You can choose whichever domain name you like.
My Domain Registrar Offers Email Services – Should I Sign Up?
As you’re making your purchase somewhere like NameCheap.com, you might notice that the domain registrar offers free email hosting as part of your purchase, or, perhaps gives the option to add on email services for an annual cost. I would advise against this!
It is best to buy your domain name and your email hosting from different vendors. Yes it’s a little more complicated and it’s an extra thing to keep track of. But it’s best to keep them separate.
This is because if the server of one vendor goes down (server = where all the files are stored), you will still have access to your other vendor’s products.
As an example, let’s say you sign up for email services with your domain registrar and their servers are hit by malware. Not only is your account with the domain registrar inaccessible, but you’ll have lost access to your email account as well! That would be quite the disaster, in my book.
Using different vendors also makes it easy to switch to a new vendor if you don’t like the current one. If you are using NameCheap.com and you decide you don’t like it, for example, you can easily transfer your domain to a new registrar, without interrupting your email services.
What About Domain, Email, AND A Website, All In One?
As a slight aside, this is also why I don’t recommend setting up your website through a company like Squarespace – which offers a domain name, email hosting, web hosting, AND website-building tools all for one monthly fee. If you decide you don’t like one aspect of their service, you’re stuck.
Also, if Squarespace suddenly goes out of business, you have lost EVERYTHING. Not likely to happen, but still a risk when you opt for an “all in one” product like Squarespace to build your site.
I Have My Domain Name — What’s Next?
Next, we’ll create your new custom email address with an email host. My host of choice is Google Workspace!
Step Two: Get A Google Workspace Account
Google Workspace is my preferred email hosting provider. If you’re like me, you already use Gmail for your personal email account. This means you’re familiar with the wide range of features and apps associated with your Gmail account – Google Calendar, Google Docs, Google Sheets, Google Drive, Google Photos, etc.
Personally, I take full advantage of ALL these different apps to help my life stay organized! So when it came to setting up my business, I decided I’d appreciate maintaining a similar set up.
That’s right, when you set up a Google Workspace account, not only do you get a new email address, you get access to an entirely new Drive, Calendar, and more.
And if you’re already using Google you know how simple it is to share items from one Google account to another. My personal and business calendars sync up so I don’t get double booked, and I can share docs and files between accounts with ease.
Hopefully by now you’re convinced. Let’s get that Google Workspace account set up!
Sign Up For A Workspace Plan
To sign up, head on over to workspace.google.com. Once you’re there, click the “Get Started” button.
You will proceed through several pages that ask questions about your business, as well as your personal contact information.
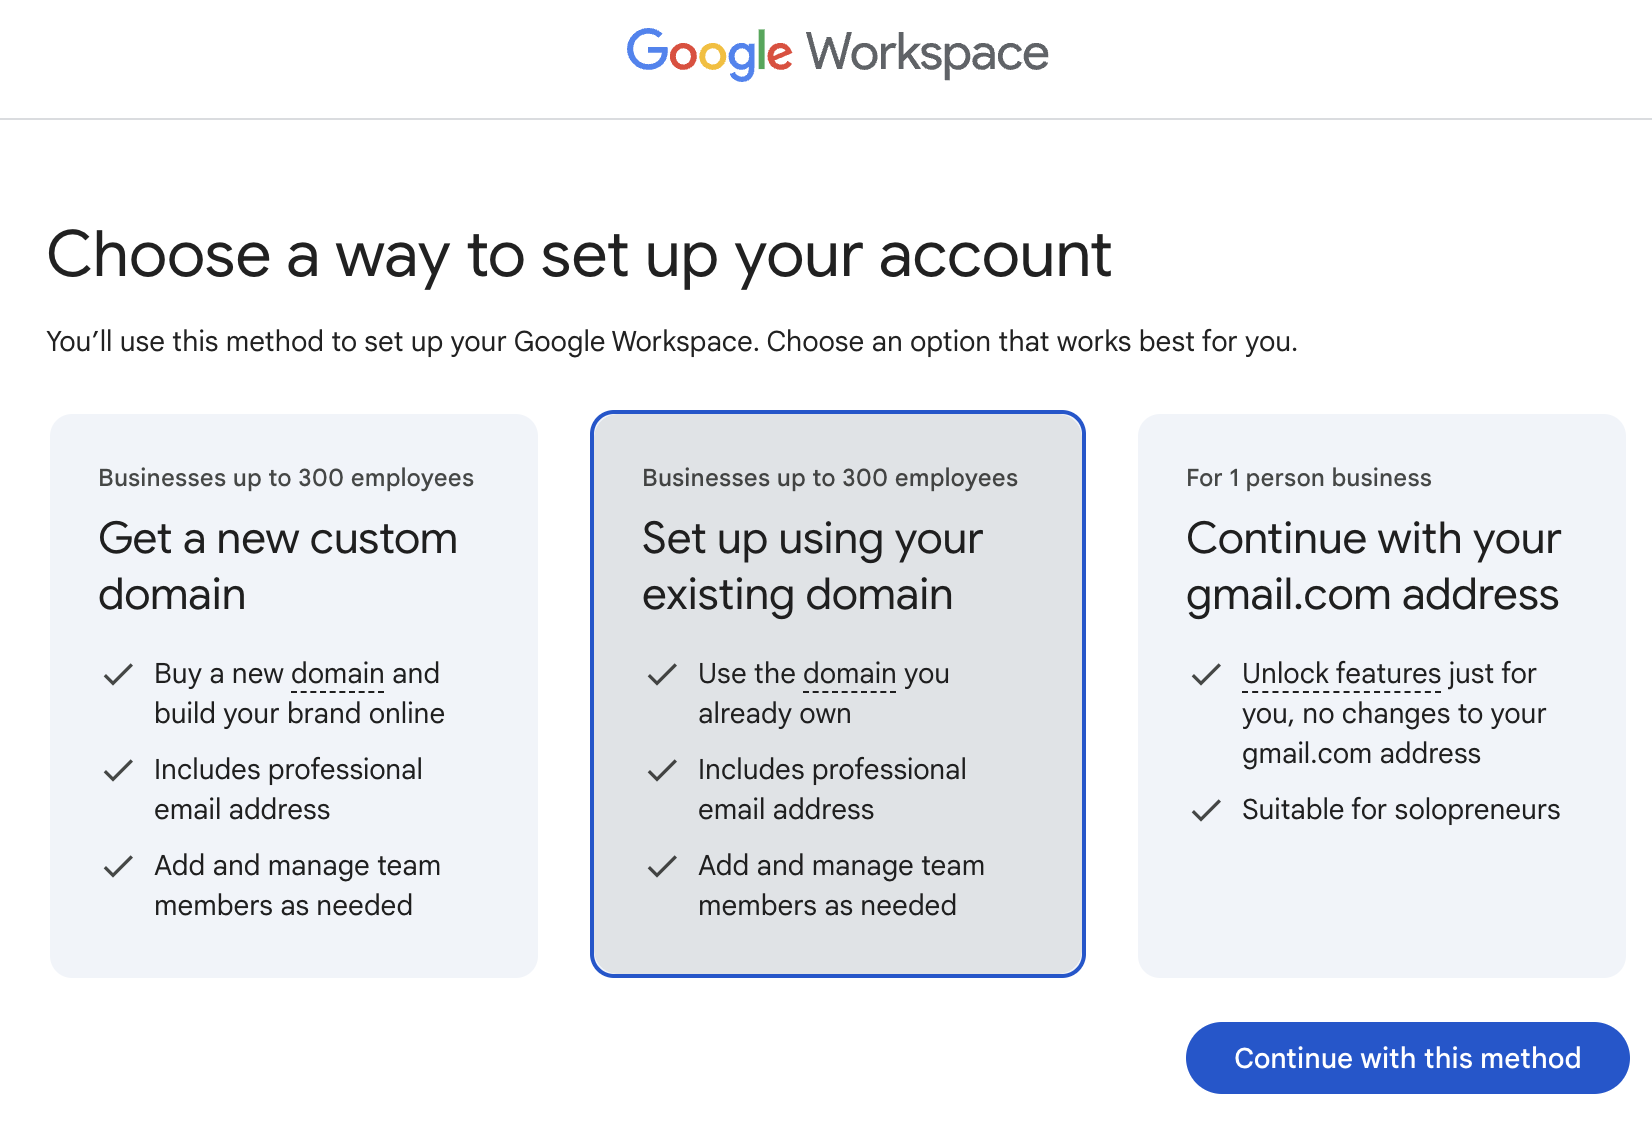
Soon you’ll come to a page titled “Choose how to set up your account”. Choose “Set up using your existing domain”.
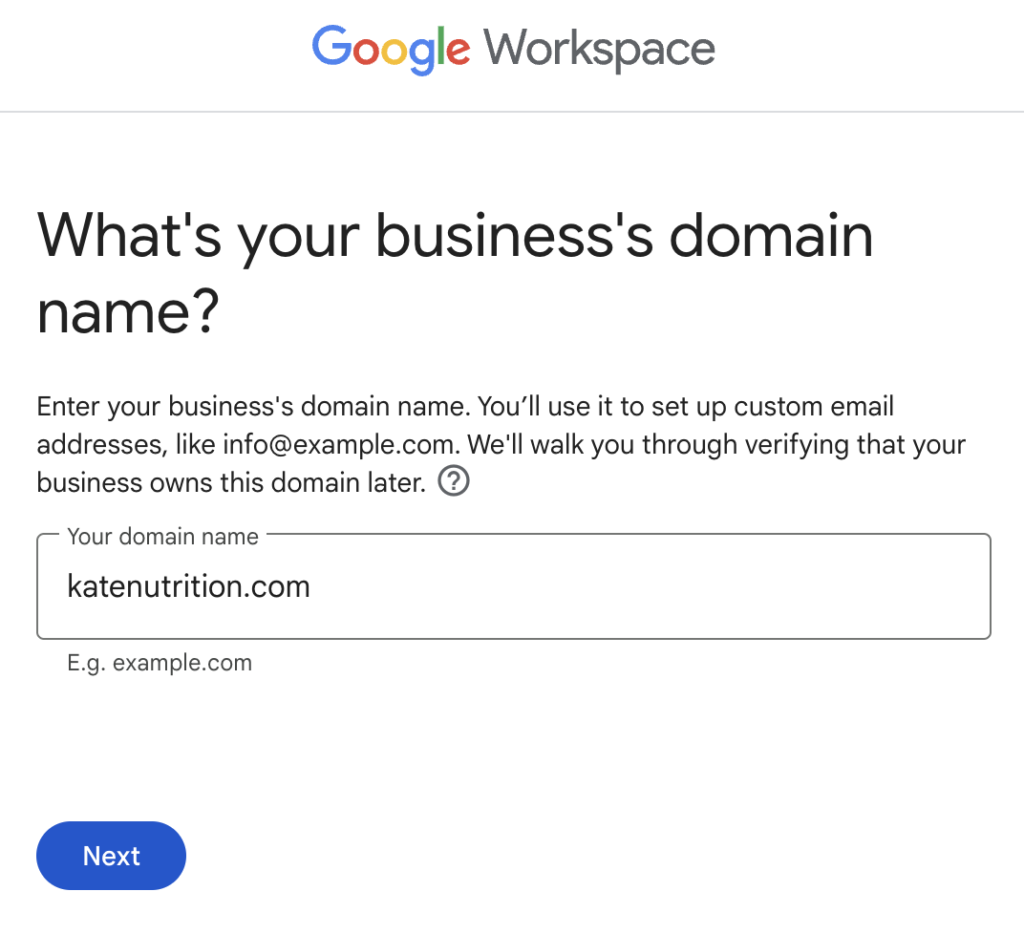
Next, you’ll enter the domain name you’ve purchased. For example, katenutrition.com.
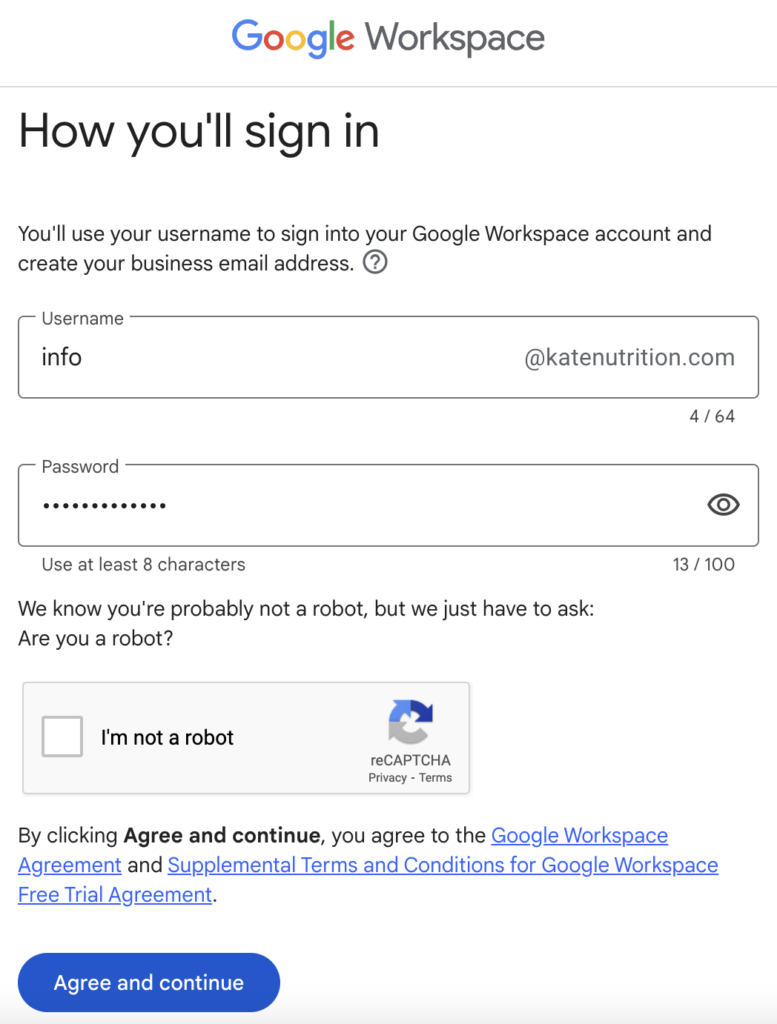
Then, you’ll decide what you want to use as your email address. For example info (@) katenutrition.com.
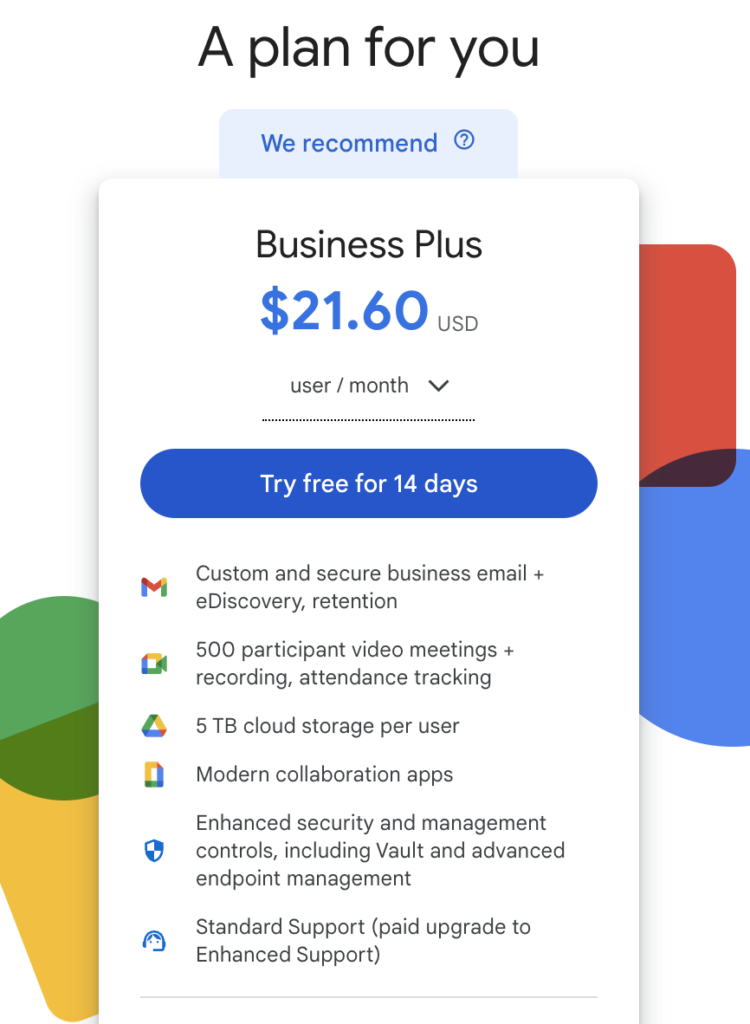
Finally, you’ll arrive at a page that asks you to select your plan. Most likely, Google will “suggest” that you buy their Business Plus plan which costs around $20/month. There is actually a less expensive plan, but they try to trick you into getting the more expensive one!
Go ahead and click the “Try free for 14 days” button. You’ll be asked to verify your business details and add your credit card information, but you won’t be charged yet.
Your Google Workspace account is now created!
Get The Cheaper Google Workspace Plan
As mentioned, Google Workspace will seemingly only offer one plan at ~$20 a month 🤔 Not bad, but maybe you were hoping for something a little cheaper. Good news, you CAN downgrade to a cheaper plan! Here is how.
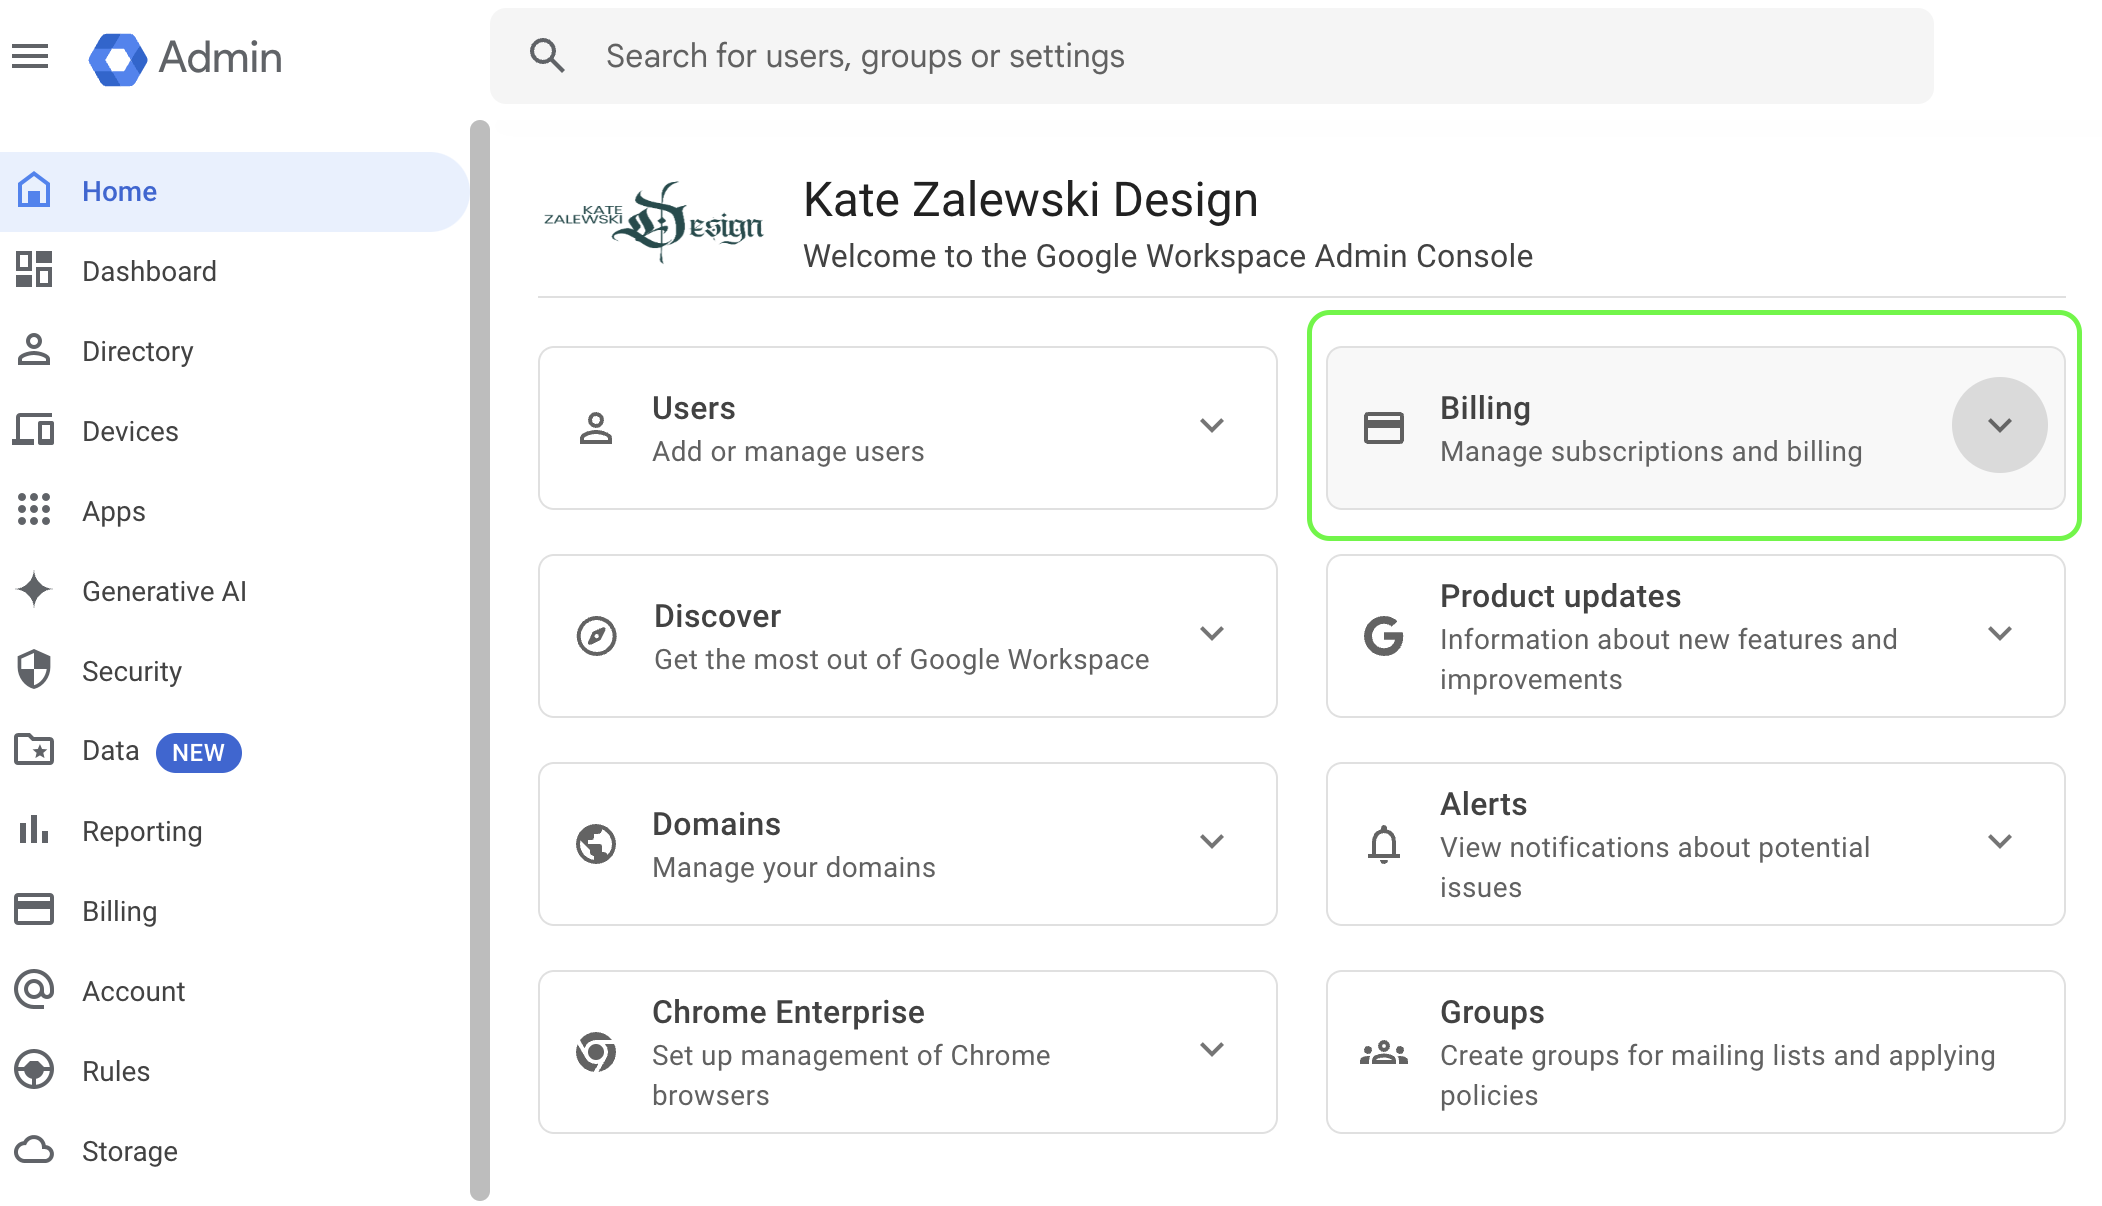
Now that you have a Google Workspace, you can access your Admin Console. Visit admin.google.com to view it.
On the main page of your Admin Console, click Billing, either from the lefthand column, or from the center of the page.
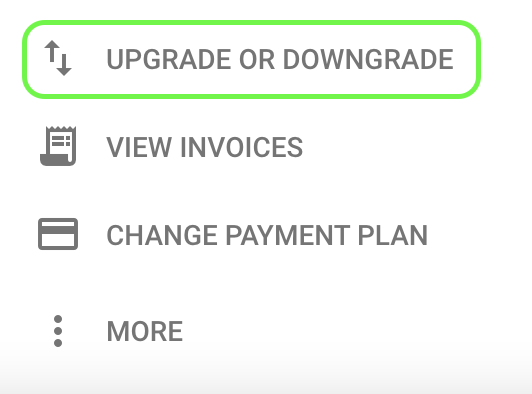
Once you click on Billing, you’ll see a list of your current subscriptions. It will say Google Workspace Business Pro. This is the more expensive plan. Click on the plan name.
On the next screen, you should see a button that says Upgrade or Downgrade. Click on that.
Now, you’ll see there are actually several different plans to choose from!
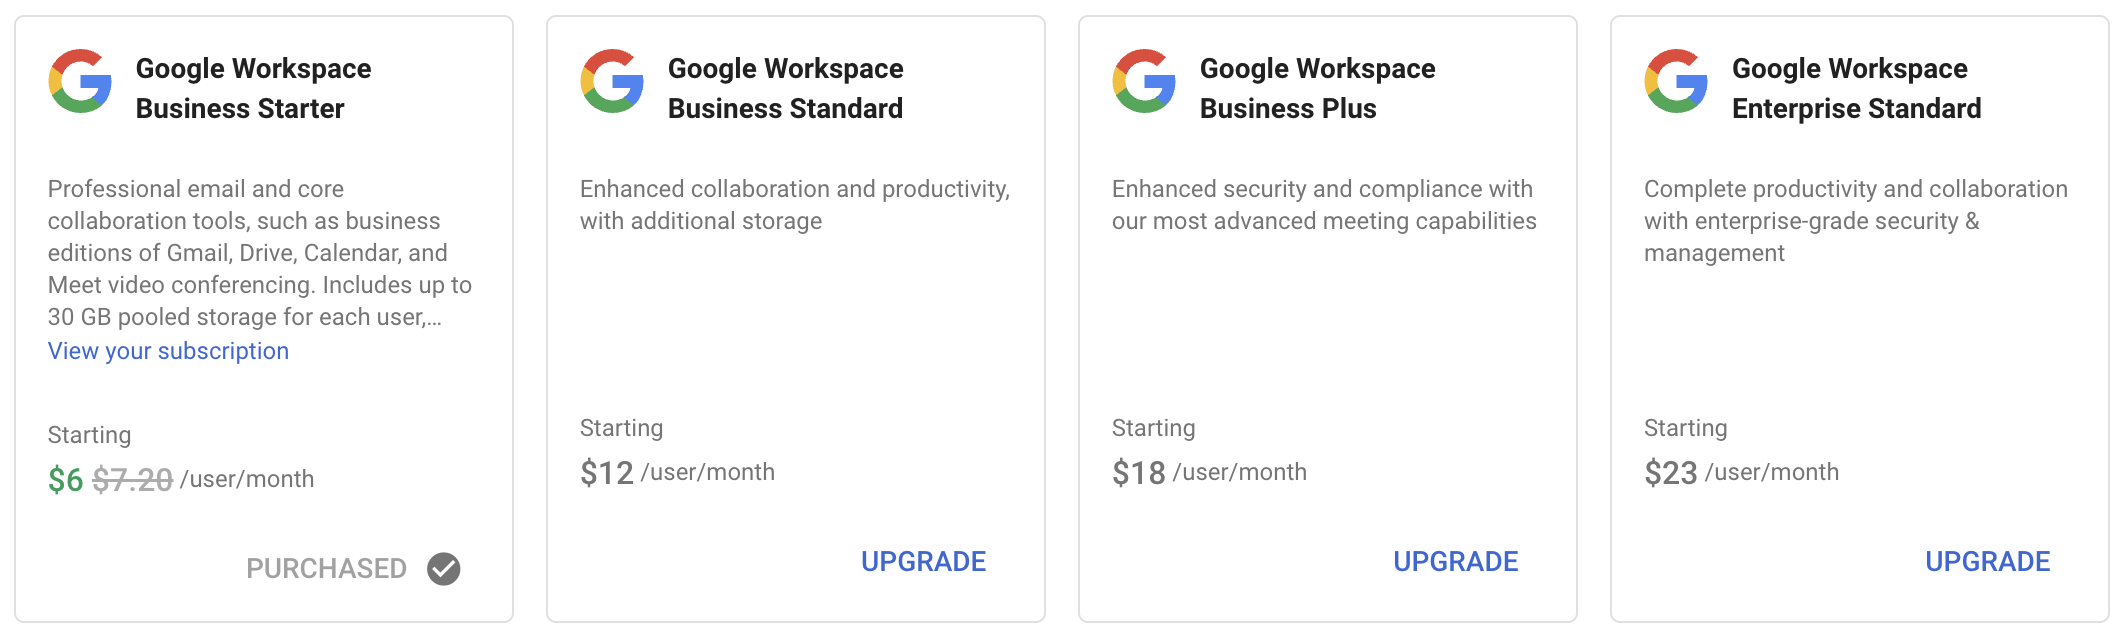
I suggest the Google Workspace Business Starter plan. It costs less than $10 per month, and adequately meets my needs as a solopreneur! I use this for both of my businesses, Kate Zalewski Design and Your Kidney Dietitian.
You will “downgrade” to the Business Starter plan. (Or, if you want to upgrade to an Enterprise plan, go for it). Click Downgrade/Upgrade and proceed to the next screen, which will show you the various features of your selected plan. Scroll to the bottom and click “Next”.
Now you’ll find yourself on a Payment Plan page. To save 10% on your Business Starter plan or Business Standard plan, use one of my discount codes! Just enter the promotion code and hit “Apply”.
Business Starter code: V33YNAPUWGKN3HJ
Business Standard code: CAT3GVW6JW6GLJQ

Finally, click the “Checkout” button to officially change your subscription plan. That was a little tricky, but we got there! With the discount, I pay $6/month for my Business Starter plan. Compared to the Business Plus plan, that’s a savings of ~$187 per year!
Step Three: Set Up Your Email
We aren’t done yet – creating a Google Workspace plan does NOT automatically create your new custom email address.
First, you’ll need to verify your domain in Google Workspace. Visit the Setup Tool in Google Workspace, found here.
Follow these instructions to Verify Your Domain. Verifying your domain is how you tell Google, “yes, I actually own sallysmithnutrition.com, that domain name I told you I owned” (swap in whatever domain name you used while setting up your account, of course).
Next, let’s connect your email. If you used NameCheap to get your domain name, follow these instructions. If you used another common domain registrar (such as Bluehost, Hostinger, DreamHost or HostGator), instructions for setting up Gmail can be found here.
This section of the process can feel a little tricky, but follow the instructions EXACTLY as described in the linked article, and you’ll be good to go. As the final step in the process, you’ll return to Google Workspace and click “Activate Gmail.”
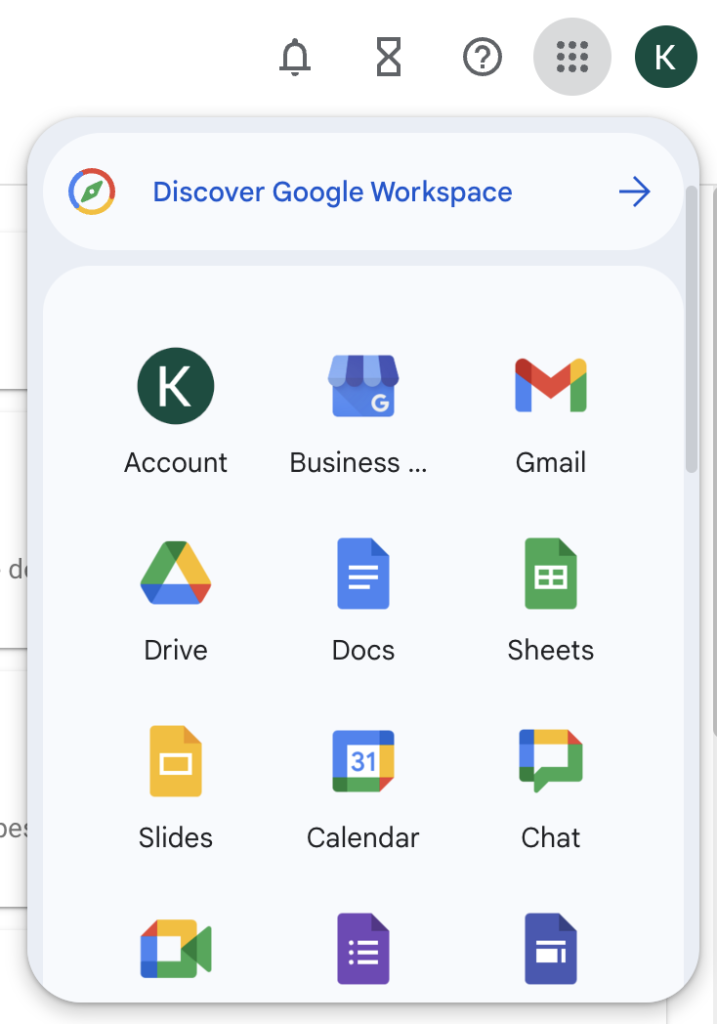
Now you should be able to access Gmail! 🎉 You can find it through the app launcher icon (9 dots in the top right corner).
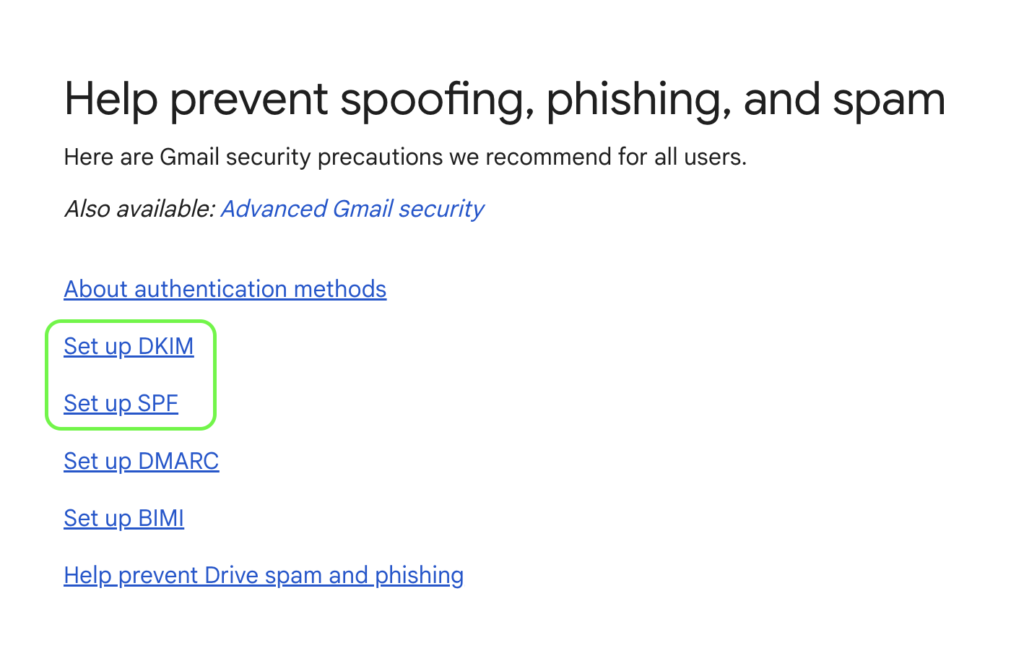
Set Up SPF and DKIM For Added Security
Just when you thought you were FINALLY done – there is one more step I recommend to take. You should set up SPF and DKIM.
What is SPF? SPF stands for Sender Policy Framework. According to Wikipedia, it is “an email authentication method which ensures the sending mail server is authorized to originate mail from the email sender’s domain.”
What is DKIM? DKIM stands for DomainKeys Identified Mail. According to Google, “As an administrator, you can set up DKIM (also called a DKIM signature) to authenticate your email and help protect your domain against spoofing. Without DKIM, messages sent from your organization or domain are more likely to be marked as spam by receiving mail servers.”
Together, “setting up SPF and DKIM is a powerful combination that can prevent messages sent from your organization or domain being marked as spam by receiving mail servers..
You don’t want your messages to get marked as spam! Therefore, I suggest setting up SPF and DKIM. Here is the tutorial from Google on how to set up each one.
Similar to the step where you connected your email to your domain name, this might feel a little tricky. Just follow the instructions EXACTLY and I promise you can get it set up.
What To Do If The Gmail App Is Missing
If you click the app launcher and you are NOT seeing the Gmail “M” icon (as shown below), you’ll need to head back to the Admin Console for an additional step.
From the main page of the Admin Console, click on Apps from the lefthand menu. Then, click Google Workspace. Then, click Gmail. Make sure the service status for Gmail is turned “ON.”
Step Four: Extras!
Make the most of your new custom email account with a few additional customizations.
Custom Email Signature
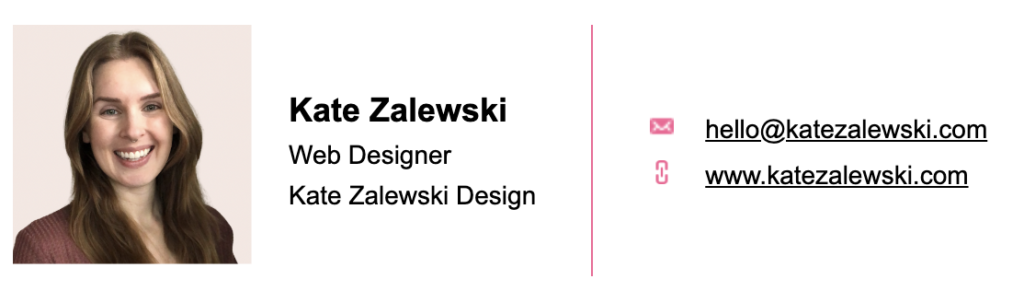
It’s a great idea to include a custom email signature with your business emails! This can include your name, title, contact info, links to social profiles, and even a photo.
To set up a basic signature, go to your Gmail settings, and scroll to the bottom of the General tab. There, you’ll see a section that says Signature. You can either enter your own simple email signature, or use a tool like HubSpot’s email signature generator to create a ~fancy~ one like mine:
After Business Hours Auto-Reply
Another recommendation for your new professional business account is to set up an “after business hours” auto-reply message. If someone emails you after working hours, they will get an email letting them know when they can expect a response.
For example, my “after business hours” message for my private practice says, “Thank you for your message! I will get back to you during usual business hours, weekdays 8am-6pm CDT. Please allow up to 72 business hours for a response. If you have an urgent medical question or concern, please contact your physician’s office. – Kate”
Unfortunately, Gmail doesn’t have this feature built in. You can use Gmail to set up a vacation “out of office” message for a specific range of dates. But there is no option to set up a daily after hours message.
To set this up, you will need to add a Workspace extension called Auto Reply Pro. You can find Auto Reply Pro in the Google Workspace Marketplace.
Click “Admin Install” to install for your entire Google Workspace account, or choose “Individual Install” if you’ve set up multiple email addresses in your Workspace account and only want the auto-replies to come from a specific email address. If you’re a solopreneur like me, you can click “Admin Install”.
After installing, go back to your main Gmail page. You’ll see a new icon for Auto Reply Pro on the slim column on the right side of the page. It looks like a little robot head:

Click on that icon to set up your auto-reply message! The app will walk you through the steps to set up your first auto-reply message.
Conclusion
Okay – now we are ACTUALLY done setting up your business email account. Who knew there was so much to setting up a new email account?
Sure, you could go about this in a slightly easier way – just use a generic Gmail or Yahoo account without a custom domain, or set up your email directly through your web host.
But by setting up a custom account with Google Workspace, you’ll have a professional, secure, custom business email address you’re excited to start using!
I hope this tutorial helped you get your business email address set up. Please feel free to leave a comment if it helped, or if there’s anything I missed.
Also, if you’re ready to finally start building the website of your dreams, I’d be happy to help! I offer affordable, totally custom web designs for dietitians and other small business owners. PS – I offer custom email set-up with all website design packages 😉 Just submit an inquiry to begin.
free!
Launch Your List
A free Mini-Course on How to Launch your Email List with Kit (Formerly ConvertKit)
In this 18-lesson course, you’ll learn the exact steps I follow to set up an email list for my clients. Plus, get my time-saving Welcome Sequence template + Canva Lead Magnet template. Sign up & get access to the course right away!