
Note: this article contains a couple affiliate links. I only share affiliate links for products I use in my personal workflow and wholeheartedly endorse!
What Is A Linktree?
If your business is on Instagram, you may currently have a “link tree” on your profile. This is a page that consolidates important links into one place – such as your website, contact info, other social media pages, shop, blog, or affiliate links.
Linktree (capital L) is actually an online business that offers this link-compiling service, though it seems like most people use the term linktree generically (like uber, google, kleenex) to describe their social media “links” page.
Here’s the Linktree created page I previously used for my private practice:

However, I no longer use Linktree to compile my links — I created my own link tree (lowercase l) instead.
Pros of Using Linktree
Linktree, the business, is nice. It offers an quick & easy way to compile links into one place. It also includes features link data/analytics on link clicks and ability to schedule certain links to appear/disappear (i.e. showcasing a time sensitive sale or offer). If you don’t have your own website, it can also function as a “landing page” for your business. These features are nice!
That said – many of us are using Linktree primarily to create a links page.
Why Create Your Own Links Page Instead
By using Linktree, anytime someone clicks that link in your Instagram profile, you are sending them to the Linktree website, and increasing traffic on Linktree’s website.
This is a HUGE missed opportunity to send people directly to your own website instead!
Because I didn’t care about the other Linktree features, I decided to make my own links page, hosted on my own website.
If you already have a website, this is quick and easy to do.
How To Create Your Custom Linktree
First, create a new page on your website. You can title it something like “Links” or “Social Links.”
Note – in the screenshots below, I am creating a page in WordPress using the Kadence theme, but you can create a similar page with different WordPress themes, or non-WP sites like Squarespace or Wix.
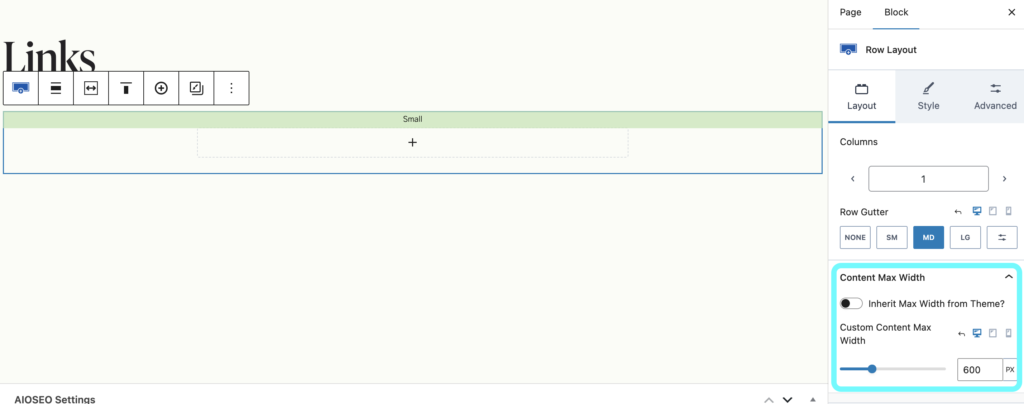
Next, I’m adding a Row Layout element and setting the width to 600 pixels.
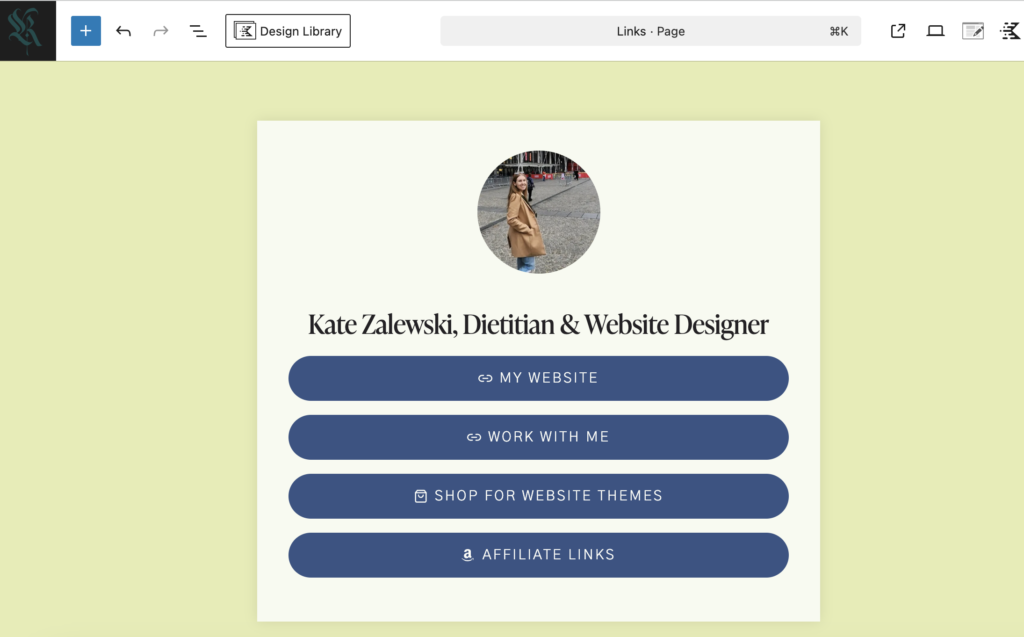
In the row I created, I am going to add an image, title, and a series of button links to my page — essentially replicating the layout of the Linktree I screenshotted above.

I set my profile image to a width of 175 pixels. I also set the buttons to “full width” to take up the full 600 pixel width of the container.
Styling Your Links Page
From here, you can continue to style if however you like.
I added a background to my page and added a drop shadow behind the links section.
You could also add icons to your link buttons if desired.
Because most people will be accessing this page from their mobile device, don’t forget to mobile optimize this page. You will most likely need to adjust the width of the links box to less than 600 pixels, or set it to fit 100% of a mobile device screen.
Final Steps
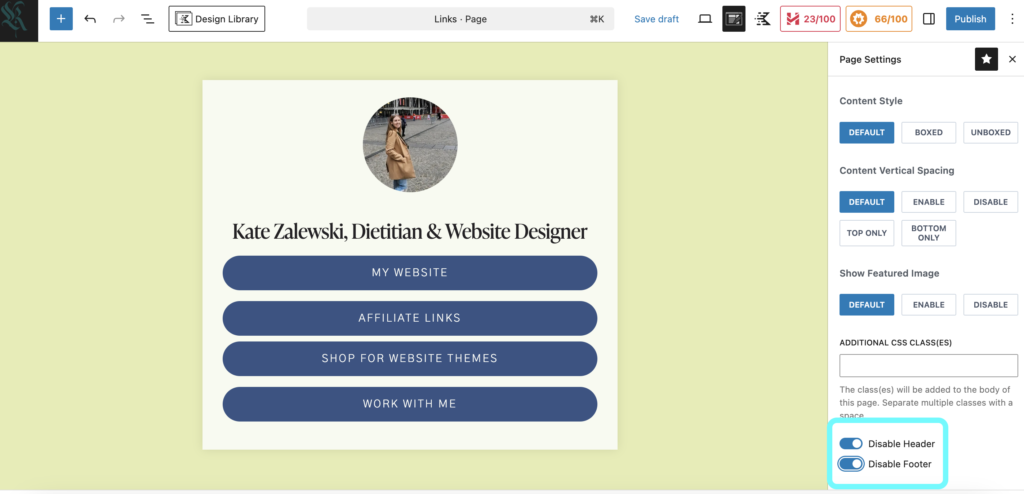
Before you publish your page, make sure to navigate to the page settings to disable your website’s header and footer. In my website theme, Kadence, I have navigated to “Post Settings” and scrolled to the bottom of the settings panels to toggle on both “Disable Header” and “Disable Footer”.
Next, if you have your website set to display any pop-ups, you should disable these for your new link tree page.
Alright, go ahead and hit Publish! Here is what my finished page looks like: https://katezalewski.com/links/
As one final step after publishing – make sure this page is NOT added to your website’s main navigation menu. This is going to be an “invisible” page on your website that someone can access with a direct link from your Instagram bio, but it is not linked anywhere on the actual website.
It is SO easy to create your own link tree and instantly start directing more traffic right to your website. Will you set up your own link tree? Let me know in the comments!
free!
Launch Your List
A free Mini-Course on How to Launch your Email List with Kit (Formerly ConvertKit)
In this 18-lesson course, you’ll learn the exact steps I follow to set up an email list for my clients. Plus, get my time-saving Welcome Sequence template + Canva Lead Magnet template. Sign up & get access to the course right away!