Note: this article contains a couple affiliate links. I only share affiliate links for products I use in my personal workflow and wholeheartedly endorse!
Introduction
Have you ever seen websites that have this cool, chunky-looking underline behind text?

How do you accomplish this? Today I’m going to show you two different ways to do it!
The first method can work for any WordPress website.
The second method is specific to websites using the Kadence Theme + Kadence Blocks on WordPress (my preferred way to build WordPress websites).
Heads up, both methods require a tiny bit of coding — but I PROMISE you can figure it out by following this guide. All you need to do is copy & paste my pre-written code into your website.
What Is The Chunky Underline Effect?
The chunky underline is NOT, in fact, an underline. If you simply underline your text, you get this kind of effect:
Underlined text example
Yup, that’s the classic underline. We’re aiming for something with a bit more flare. A thick underline in a contrasting color can really make your text pop off the page.
If you already know a bit about coding, you can create a true thick underline by adding some custom CSS to your site (with the text-decoration-thickness property):

But that’s not quite what we’re going for.
The chunky underline in the example at the very top of the page can be achieved in a couple ways. Below, I’m going to describe two ways to do it. You can add either a box shadow (option 1) or a background (option 2) to your text.
Two Ways to Add the Chunky Underline
Let’s start by discussing the box shadow option, which works well for any WordPress website. This includes sites built with visual page builders like Elementor or Divi. You can also use it for block themes like Kadence.
Add a chunky underline with a box shadow (works for any WordPress site)
A box shadow is exactly what it sounds like. It adds a shadow effect around the outside of an element. Usually box shadows add a blurred, shadowy effect. Box shadow can also be applied without the blur effect, to the inside of a text element.
To start, we’re going to add some custom CSS. Don’t be scared, you can do it!
Add Custom CSS
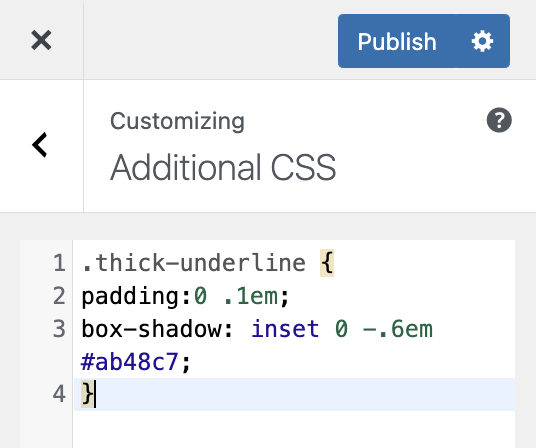
To find the CSS Customizer in WordPress, navigate to Customize → Additional CSS.
Copy and paste the below code into the Additional CSS box:
.thick-underline {
padding:0 .1em;
box-shadow: inset 0 -.6em #ab48c7;
}
Replace #ab48c7 with the hex code for whichever color you prefer! The hex code is a 6-digit alpha-numerical code starting with a pound sign that corresponds to a specific color.
You can use Google’s color picker tool to search for hex codes. Just type “color picker” into your Google search bar and it will come right up.
Here’s how it should look when you’ve pasted in your code.
Hit Publish. Now, open up your website page editor.
Edit Your On-Page Text
I’m assuming you’re using some kind of visual page builder tool (like Elementor) where you can edit the text right on the page. Usually there is an option to edit elements visually or edit the HTML/code. Click on the text element and switch to the HTML editor.
Find the text you want to underline and surround it with the following code:
<span class="thick-underline">text you want underlined goes here!</span>Here’s how it looks visually in my page editor:

You can see the words “attention grabbing” are underlined, but not the rest.
Now save your page. You should see the chunky underline effect behind your text!
If you don’t see the underline, make sure you copied the code correctly and did BOTH steps – adding the custom CSS and editing the HTML for your text element.
This concludes the instructions for the first method of adding the chunky underline.
Up next, if you’re using Kadence to build your website (like I do for most of my clients’ websites), you have an additional option that’s just as easy.
Add a Chunky Underline as a Background Element
The first method we looked at created the chunky underline effect with an inset box shadow.
The second method sets your desired underline color as a background behind the text – not the entire text element however, just the bottom 40%. The upper 60% is set as a transparent background.
There are two steps to do this in Kadence.
Highlight Your Text with the Advanced Text Feature
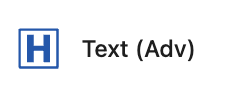
We will utilize Kadence’s Advanced Highlight feature for this method. Make sure you’re typing into an Advanced Text block to do this:
Open up your page builder, select the text you want to underline, then turn on “Advanced Highlight”.
Advanced Highlight is found in the toolbar.
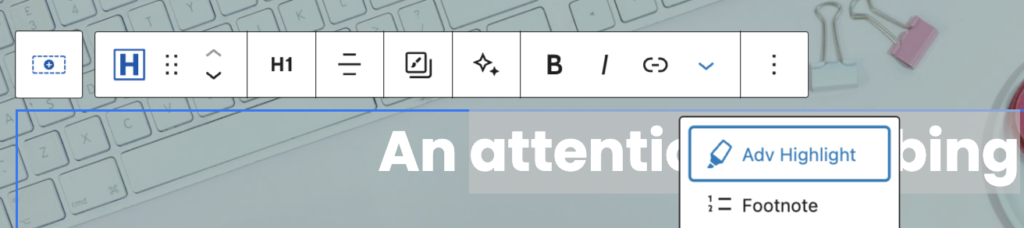
The text you highlighted will turn a pre-set color like bright orange. Don’t worry about this. It just helps you identify which text is using the Advanced Highlight feature & won’t cross over to the actual website page with the code we’re going to add.
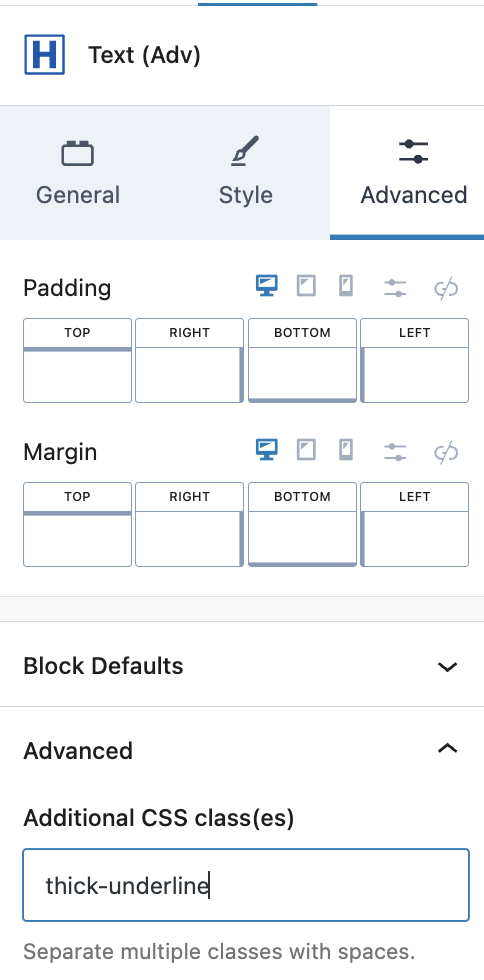
Add A CSS Class To Your Text
Next go to the Block Settings panel for your Advanced Text. Click the Advanced tab at the top, then under Additional CSS class(es), type thick-underline as shown below.
Save your page. Next we’ll add some custom CSS.
Add Custom CSS
To find the CSS Customizer, navigate to Customize → Additional CSS.
Copy and paste the below code into the Additional CSS box:
.wp-block-kadence-advancedheading.thick-underline mark {
  color:inherit;
  background: transparent;
  background: linear-gradient(180deg, transparent 60%, #d968c0 0);
}
This sets the top 60% of your text as transparent, the rest as the color of your choosing. Just replace the hex code in the above example (#d968c0) with your preferred color’s hex code. Again, just Google search “color picker” to pull up Google’s color picker tool.
Hit Publish. Open your website editor and you should see the cool chunky underline in effect!
Conclusion
Congrats! You did it! Especially if this is your first time adding some custom CSS to your website, I’m super proud of you 👏
Interested in more simple coding tutorials like this one? Let me know in the comments.
Btw, if you’re thinking “you know… I’d rather just leave all this coding stuff to the pros” … that is also totally fine. I love adding fun elements like this to my client’s websites with custom code.
You can hire me for hourly work if you just need a few tweaks. If you are ready for a total website overhaul, I’m also booking new web design clients now! Looking forward to chatting about your web design needs.
free!
Launch Your List
A free Mini-Course on How to Launch your Email List with Kit (Formerly ConvertKit)
In this 18-lesson course, you’ll learn the exact steps I follow to set up an email list for my clients. Plus, get my time-saving Welcome Sequence template + Canva Lead Magnet template. Sign up & get access to the course right away!